Creating a New Project
Valid for
|
GridVis editions |
Software platform |
|
|
|

![]()
Note
A project can use either the Janitza DB (standard) or an SQL database.
When the Janitza DB is used, the project folder must be local.
Open the New project window using the File > New project button.
A project for the GridVis desktop is selected automatically. Confirm with Next.
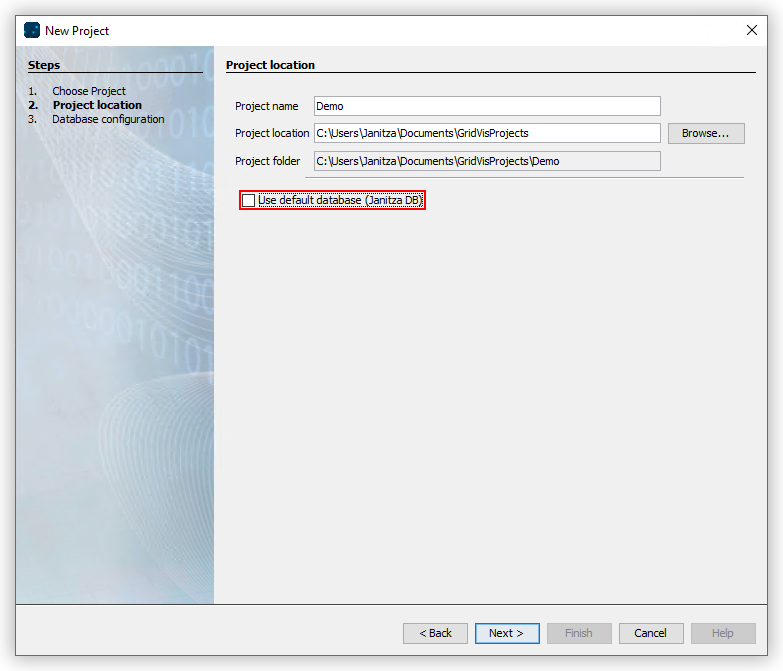
Enter a Project name and a Project location. Note that the name of a created project cannot be changed.
If you want to use an SQL database, deselect the option Use default database. Confirm with Next.
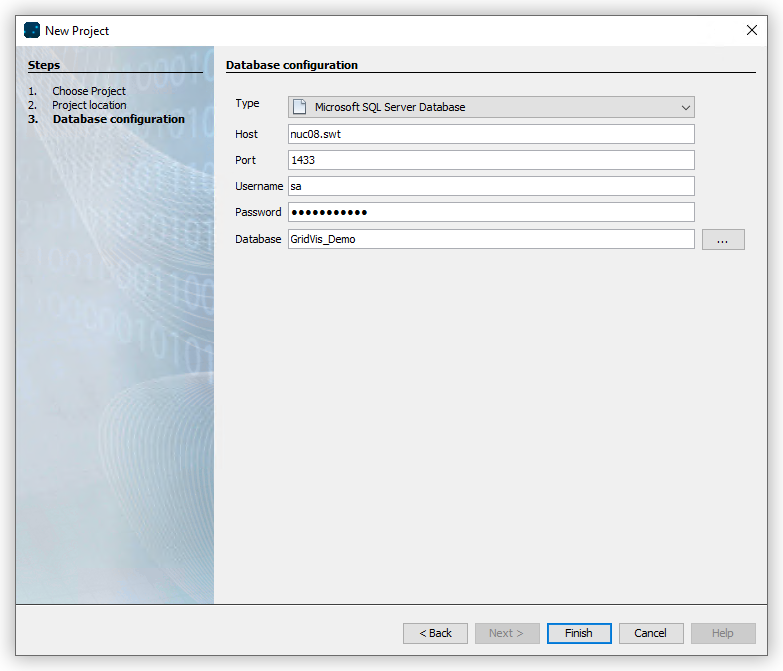
If necessary, enter the database type and the access data for the SQL database. Confirm with Next.
Create the project with the Done button. If required, confirm the creation of the database.
Before you can use the project, it must be licensed. Information about licensing can be found here .