User Editor
To work with the User Editor, create and connect a user directory (database for user management) with the GridVis software (cf. Create New User Editor ).
The GridVis administrator has to set up the access rights for other users with the corresponding roles and rights. To do this, the GridVis administrator uses the User Editor.
In the User Editor window, the GridVis administrator (or another user with an equivalent authorization) can complete, configure or delete other users who want to access a project that is protected with user management.
In the User Editor window, the accesses corresponding to the role (rights) for the user appear; e.g. a user with the role READ_ONLY will only see his own access.
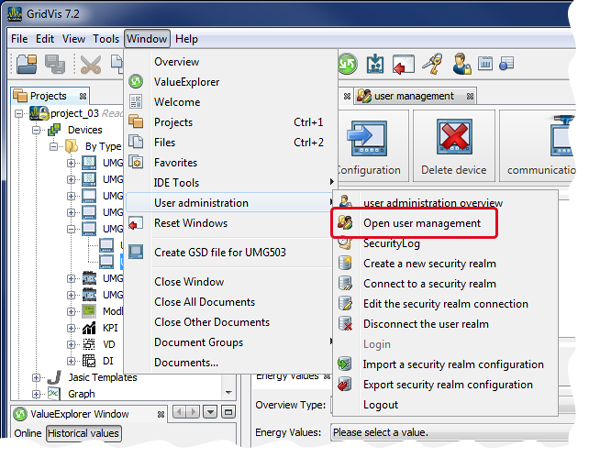
The User Editor window can be opened in 2 ways:
In the User Management Overview window in step 2 Set Up User, click on the Open User Editor button or
click on the Open User Editor button in the submenu User Management of the menu bar entry Window (see figure in the upper right).
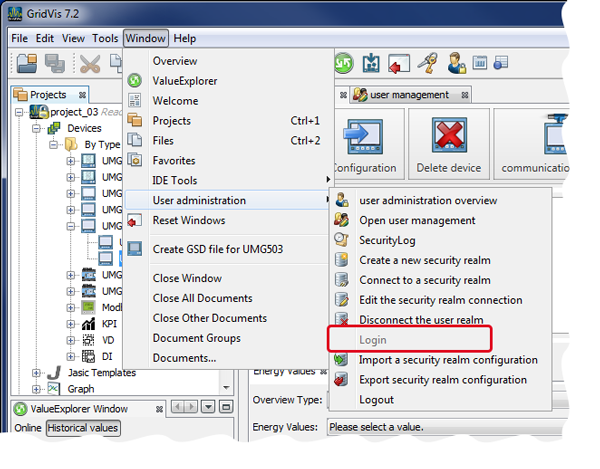
If in the User Editor window, the message Please log in first to use the User Editor appears, log in as follows:
In the User Management Overview window under the user actions, click on the Log In button or
click on the Log In button in the submenu User Management of the menu bar entry Window (see figure on the right).
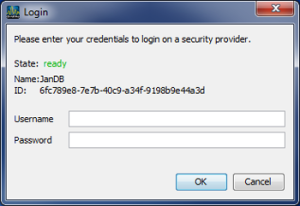
The dialog box Log In to the User Directory will appear.
If no users have been created or if only the GridVis administrator admin is available, then enter into the input field the user name admin (preset) and the password issued for administrative work inside of GridVis as the password (cf. Create a new security realm ).
An error message will appear if the use name and/or the password don’t match or if the user does not have the rights. Check what you have entered or contact the GridVis administrator.
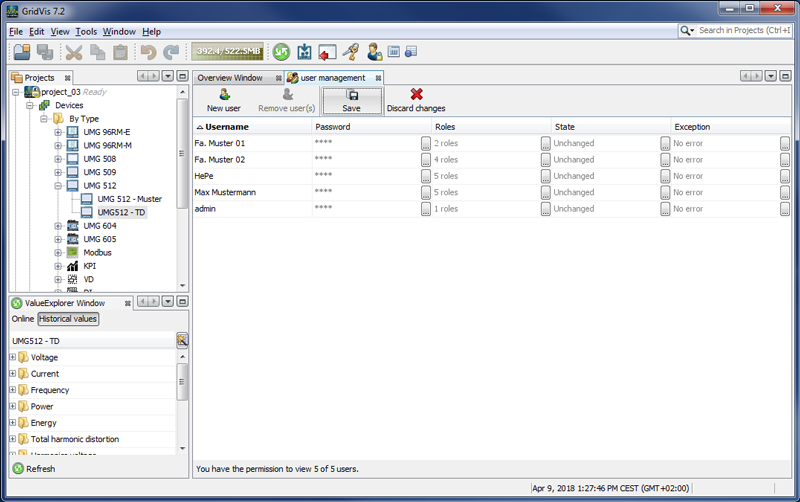
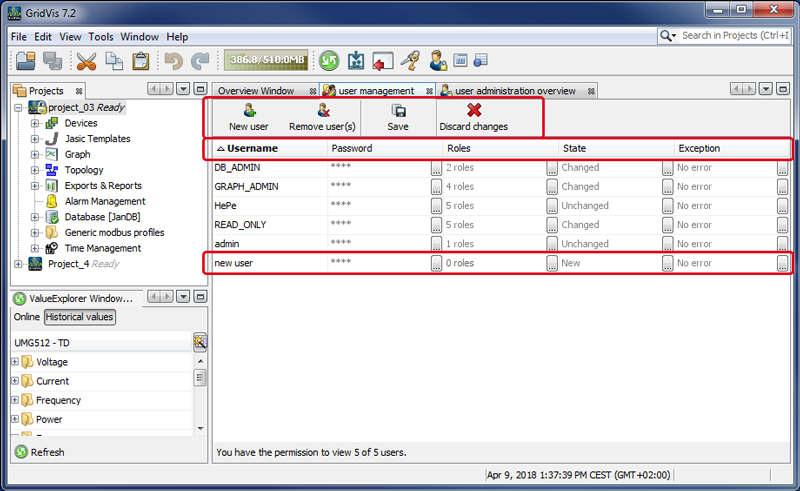
After you have successfully logged in, the User Editor window will appear, showing a table of all users (depending on your authorization).
|
Description |
|
Click for New User to appear in the column User Name with the status New. Single-click to mark the user name User Name and enter a new name. Confirm the entry with the Return Key. |
|
Single-clicking changes the Status of the marked user to the mode Delete. Single-click on the button Discard Changes to set the status of the marked user back to Unchanged after confirming through a dialog box. Only once the button Save (Save changes) has been activated, is the previously marked user (Status: Delete) permanently deleted from the database system. |
|
One click saves all of the changes to the users (Status = New or Changed) in the database. After saving, the status is switched to Unchanged. |
|
A single click discards unsaved changes to a user (status = New or Changed). Example: |
|
Click on the user name to mark the user name. The marked user name can be changed. The status of the user switches to New or Changed. Deactivate your user name changes by clicking on the Discard Changes button. Activate your user name changes by clicking on the Save button. |
|
To assign a password to a user, click on the "..." button at the end of the field. In the following dialog box, enter the password and confirm by re-entering it. Confirm in the dialog box with OK. The status of the user switches to Changed. Deactivate the password changes by clicking on the Discard Changes button. Activate your password changes by clicking on the Save button. |
|
To assign roles to a user, click on the "..." button at the end of the field. Activate the checkbox for the desired "Role" of the user in the following dialog box. Confirm in the dialog box with OK. The status of the user switches to Changed. Deactivate the role changes by clicking on the Discard Changes button. Activate your role changes by clicking on the button Save button. |
|
This field shows the status of a user:
|
|
This field shows errors. |