Add device
Secure TCP/IP connection
Valid for
|
GridVis edition |
Software platform |
|
|
|

![]()
The GridVis Desktop enables users to add new devices and then use them in the GridVis Desktop and the GridVis Web.
Adding new devices is only possible with the GridVis Desktop.
In the project tree, open the entry Devices. This is located in the left menu bar of the GridVis application.
Double-click on the entry By type to open the Overview window. (1)
Click the Add new device button (2). This opens the New file window (see Fig. 2).
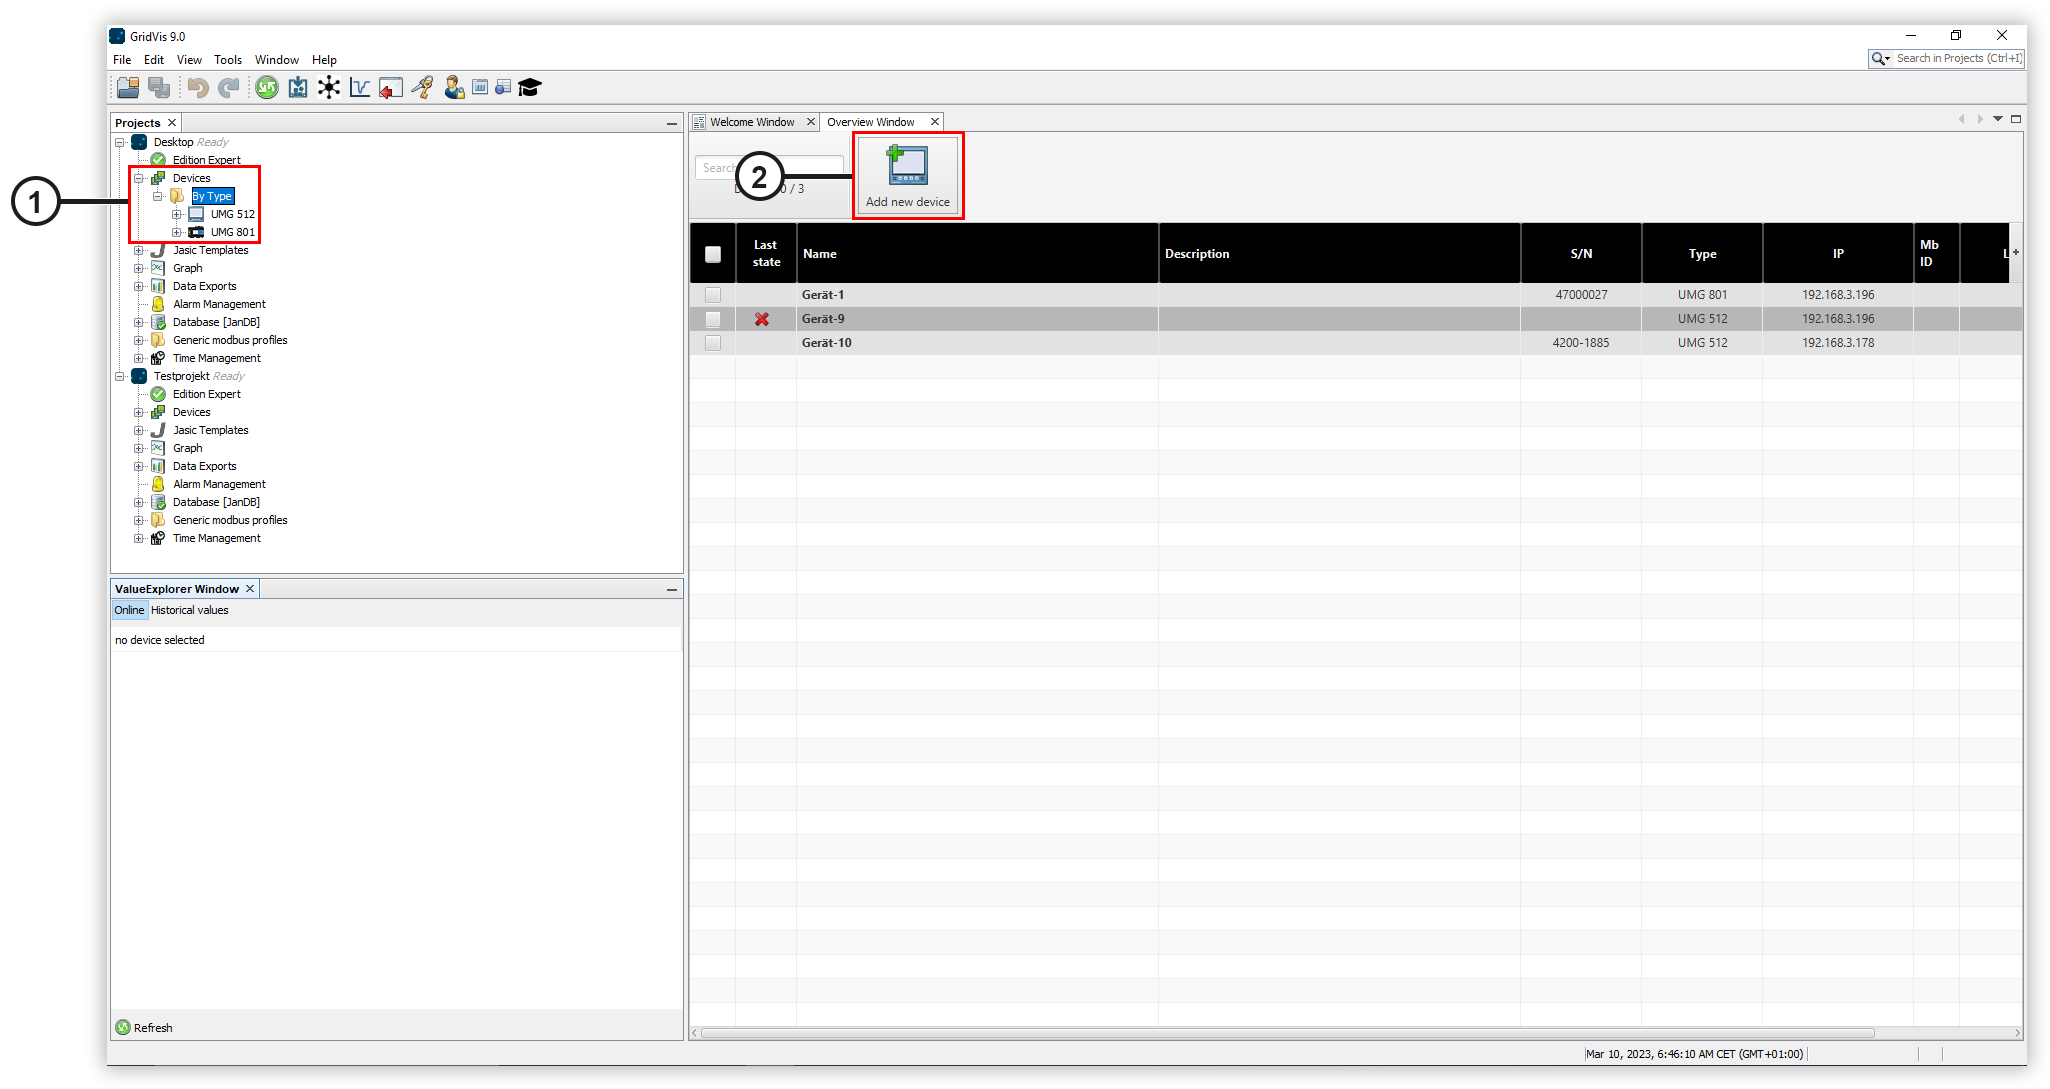
You can select and add the desired device in the New file window.
Under Categories, select the correct series of your device.
Then, under File types, select the correct device type and click Next.

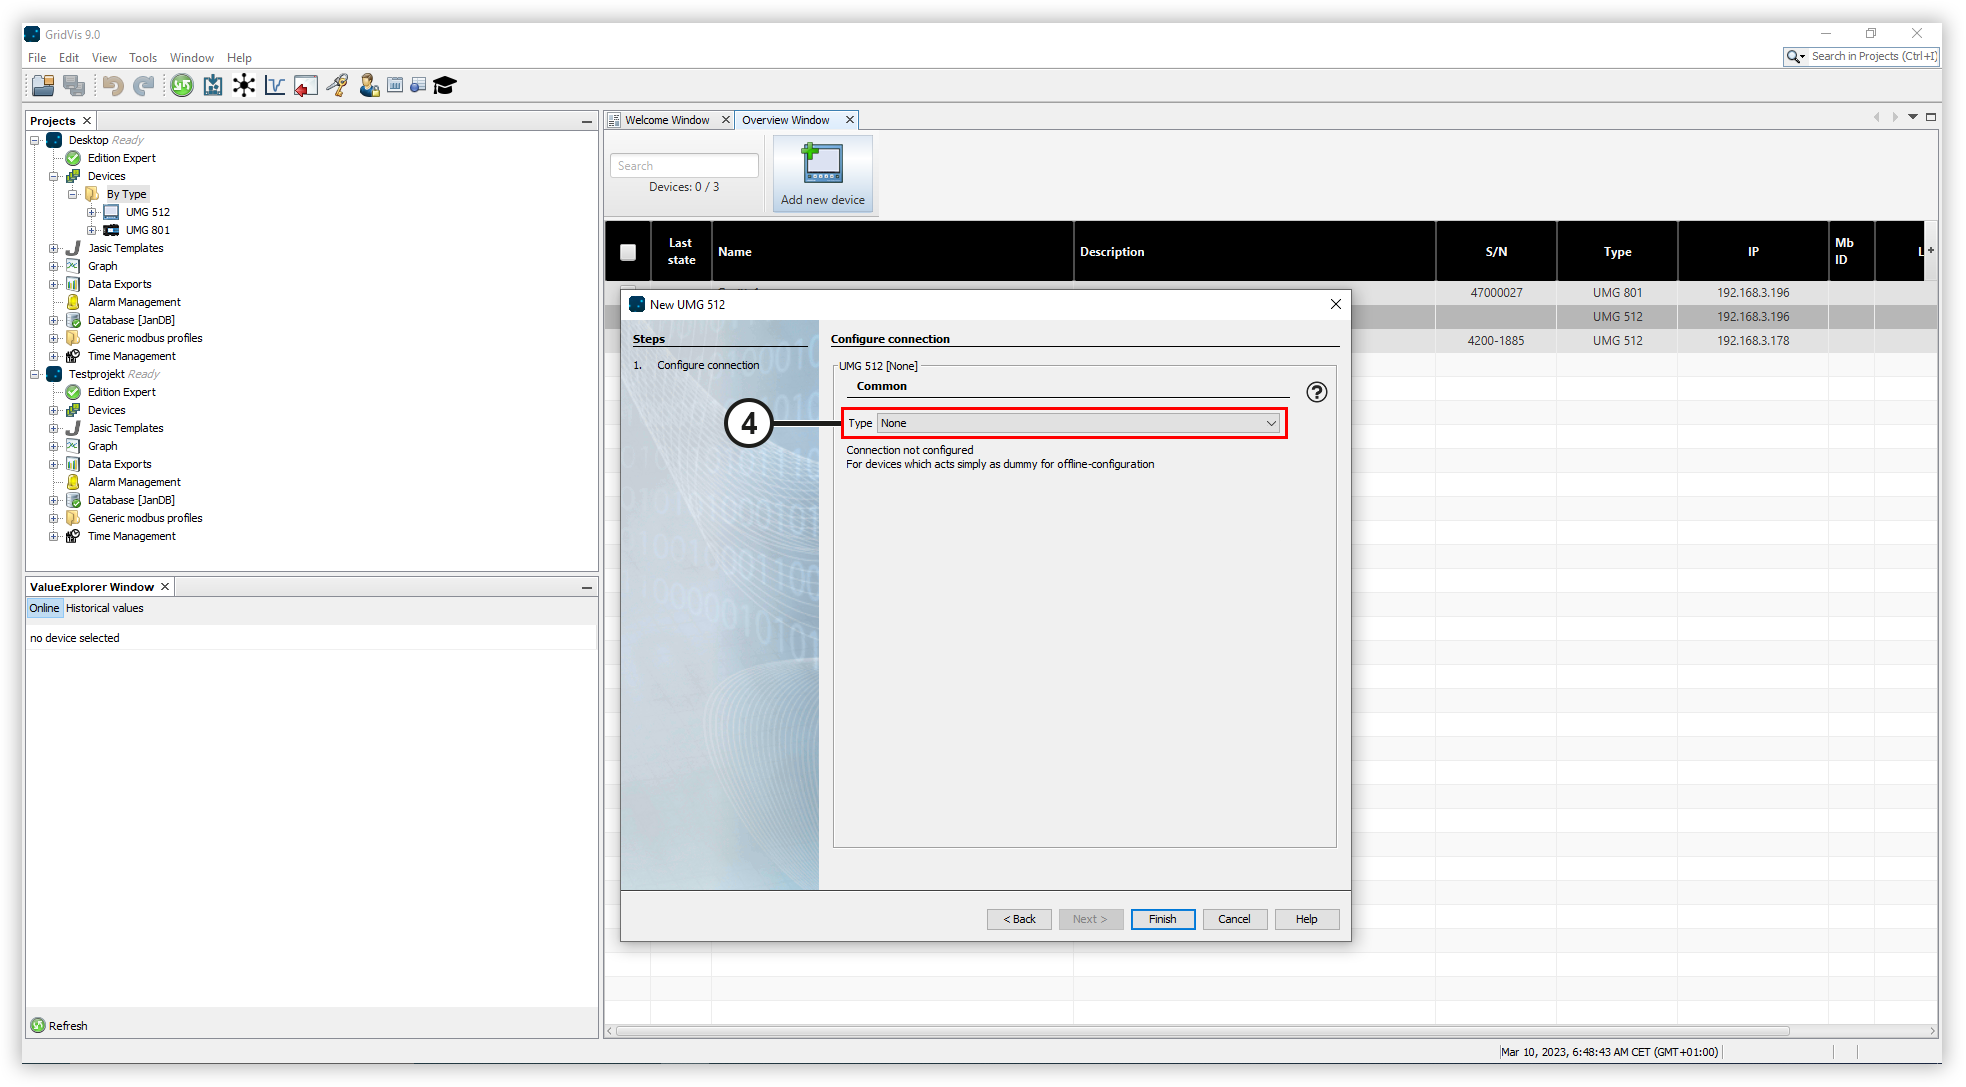
After selecting the device, the connection settings must be made.
Select the connection type for your device. This depends on the device and its installation method. You can find the connection type of your device in the user manual of the device.
You can also create a device without a connection. This means it then serves as a placeholder, for example, to reserve items of your license.
Enter the connection settings needed for the selected connection type.
Test the connection by clicking on the Connection test button.
Click Finish. The device has been added successfully and can be used in the GridVis.
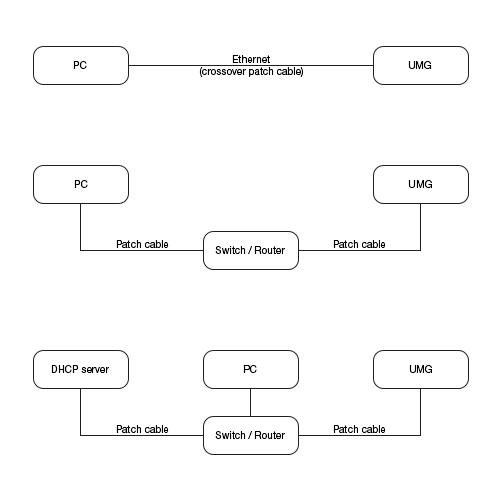
The common connection types are:
Connection types via Ethernet
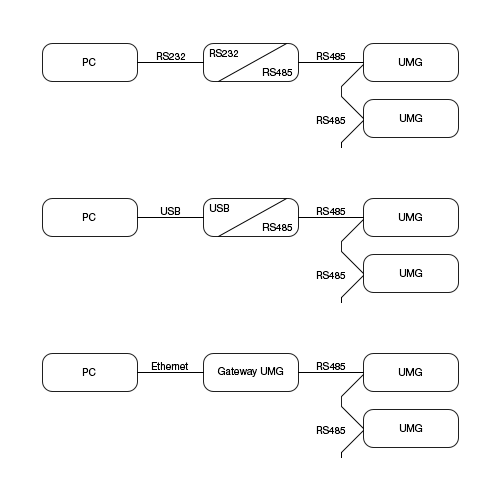
Connection types via interface converter or gateway device
|
Type |
Used for |
|
With no connection |
Pre-configuration of a device to which a connection is not yet possible. |
|
Modbus RTU / M-Bus |
Connection to a device via an interface converter RS-232/RS-485 or USB/RS-485 or a level converter for M-Bus. |
|
Ethernet gateway / EasyGateway |
Connection to a device connected to a basic device via RS-485/Modbus RTU. The basic device functions as a gateway to the Ethernet. For the Host / IP address, enter the IP address of the basic device/gateway, and for the Device address, enter the Modbus address of the device you want to connect. |
|
Ethernet / TCP/IP / HTTP |
Connection to a device via network cable. A connection via network cable is possible for some devices using an additional module (e.g. UMG PA/PQ series via the 96-PA-RCM-EL module). You can find information about connection via a secure TCP/IP connection here. Make sure that your PC and your device are in the same network segment. If necessary, contact your network administrator. |
|
USB (only UMG 96RM-P/-CBM) |
Connection to a device via USB. A driver update may be necessary. Contact your administrator. |
|
OPC UA |
Information about the OPC UA Client can be found here. |