Exporting and Importing Projects
![]()
Exporting a project
Proceed as follows to export a project:
Click the File button and then select the Export Project list item.
Select the project you want to export and click the Next button.
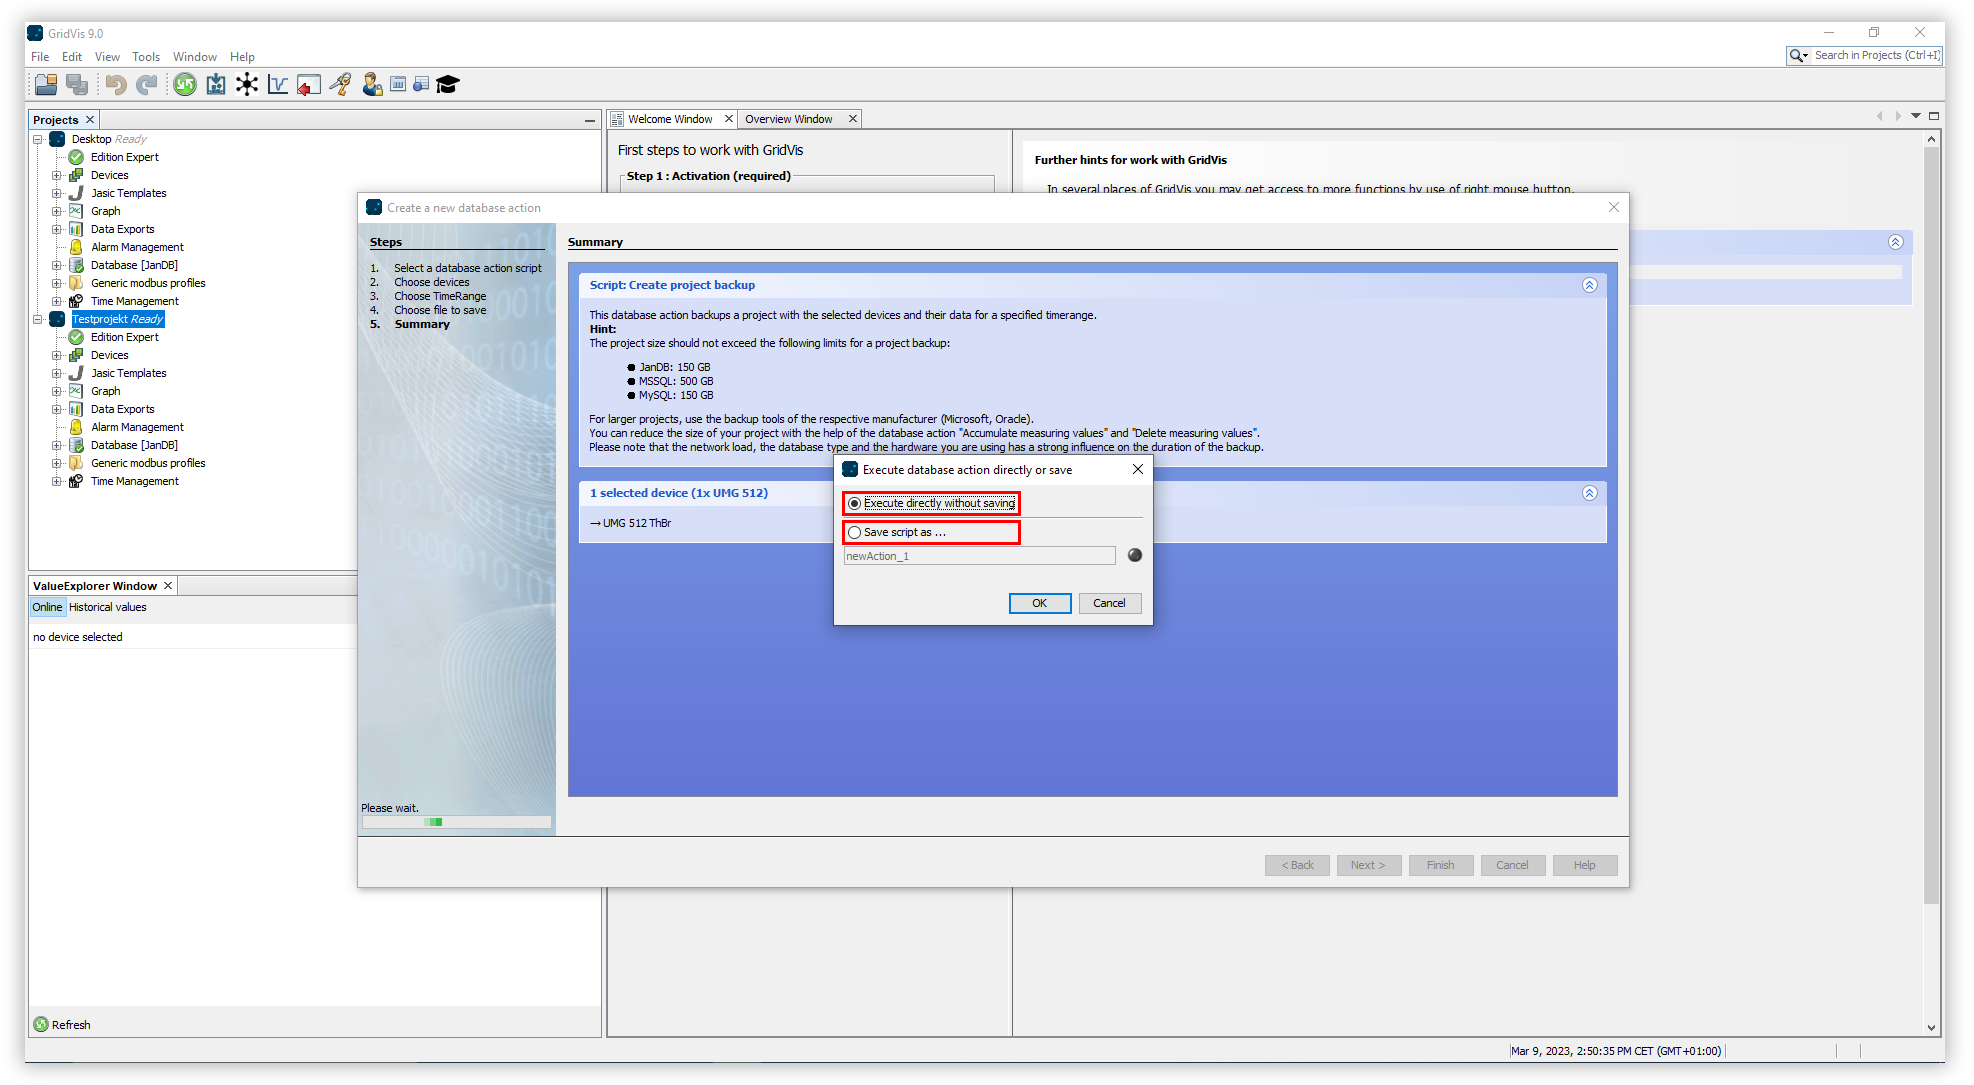
The Create A New Database Action window opens. Select the Create Project Backup script and click the Next button.
Select the devices to be included in the export and click the Next button.
Select the period to be included in the export and click the Next button.
Select the storage location for the export. To do this, click the Select Storage Location button.
Select the File Action for the export. If the file already exists, you can overwrite it or append the creation date and time to create a new file. Then click the Next button.
When you are finished, click the Done button.
The Execute Database Action Directly or Save window opens. Here you have two options to choose from:
Select Execute Directly Without Saving to run the script without saving it.
Select Save Script As to save the action as a script. This way you can perform the export faster in the future using the selected settings.
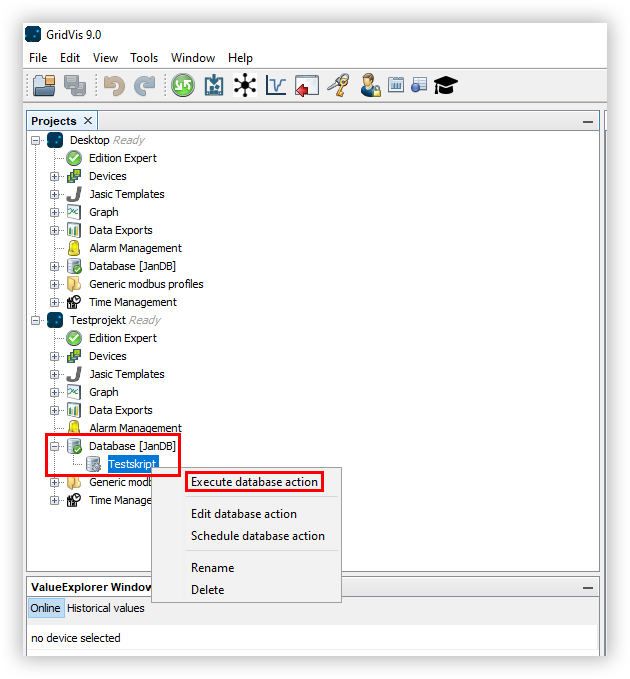
Note
If you save the script, it must then be executed manually. To execute the script, open the Database entry in the project tree. Then right-click on your script and select the Execute Database Action menu item. The progress of the execution is displayed at the bottom of the GridVis screen.
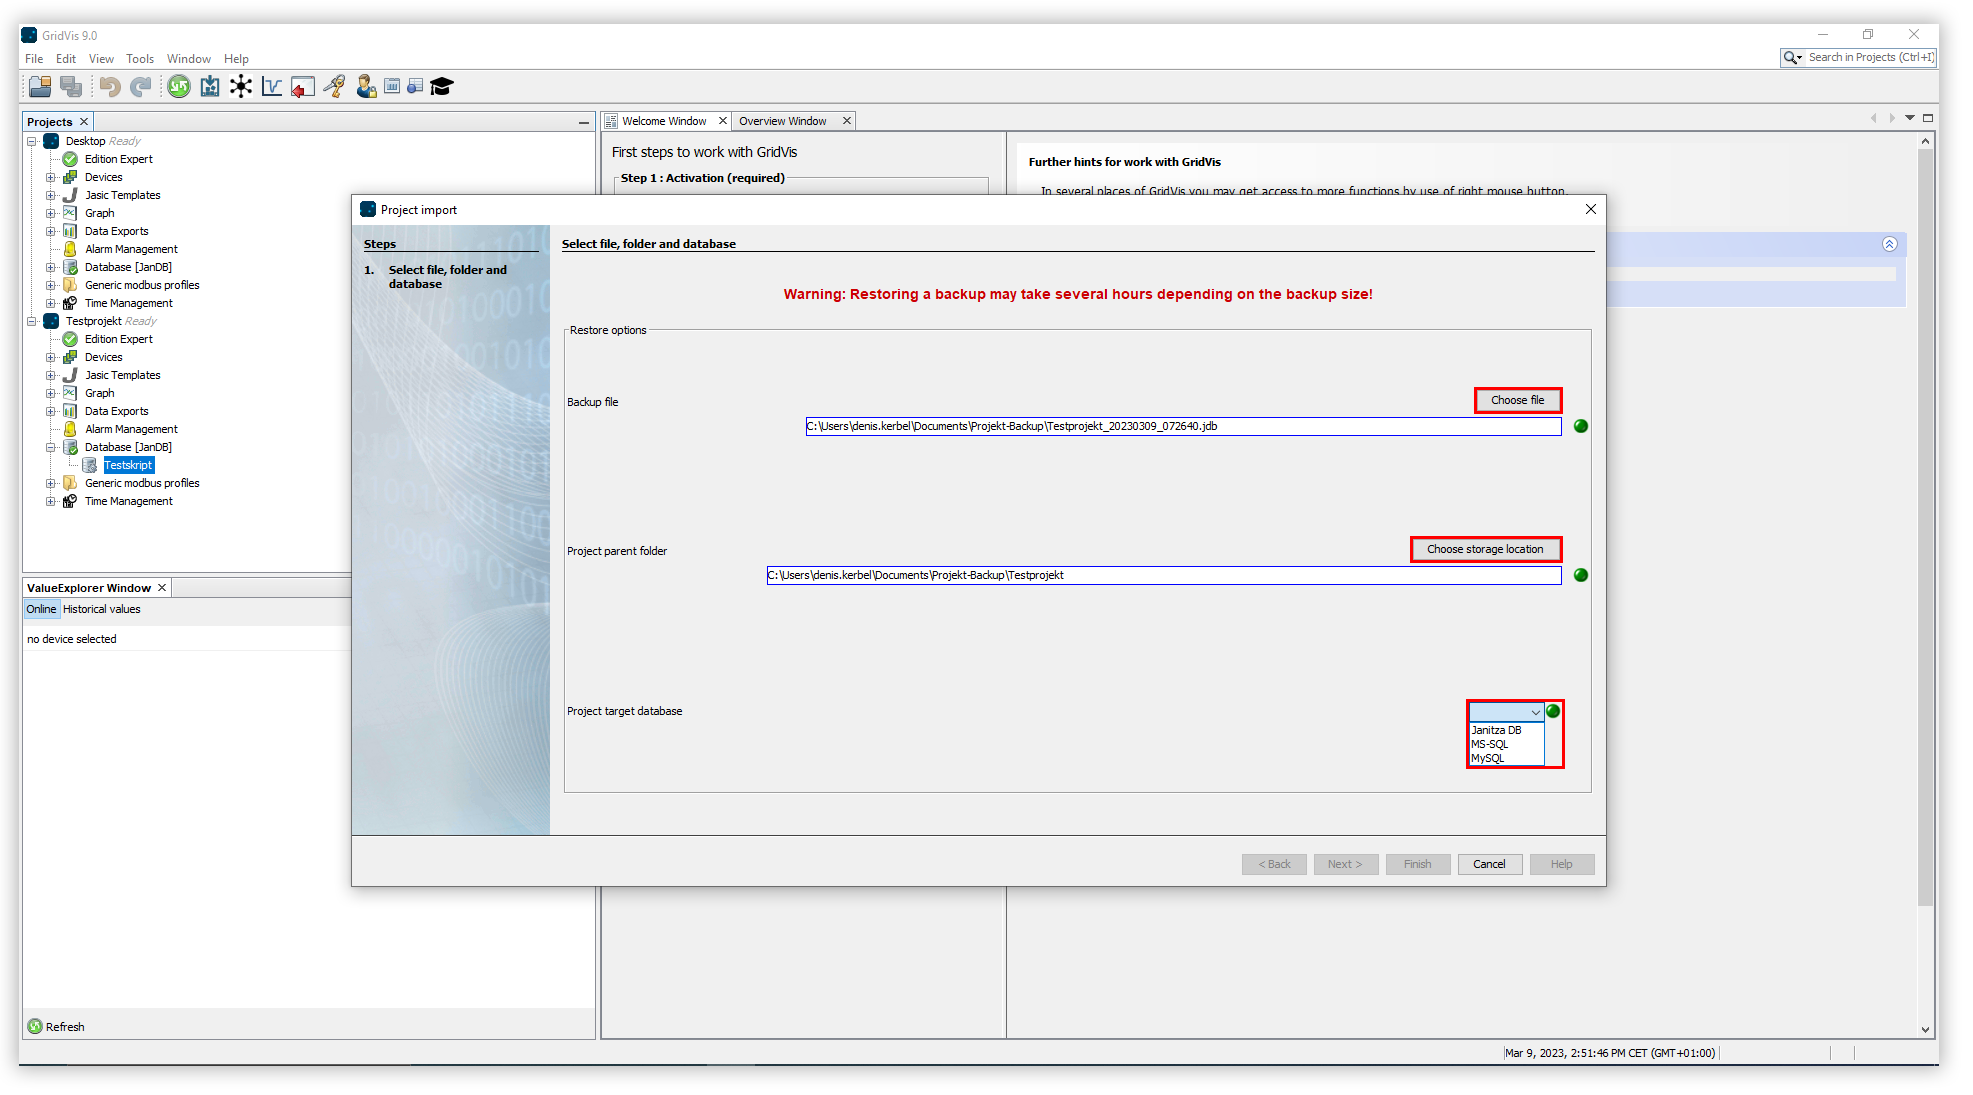
Importing a project
Note
Restoring a backup can take several hours, depending on its size!
Proceed as follows to import a project:
Click the File button and then select the Import Project list item.
Click the Choose File button to select the project file you want to import.
Specify a storage location for the imported project by clicking the Choose Storage Location button. Navigate to the storage location of the project and select it. Then click the Open button. All future changes to the project will be saved here in the future.
Now select the desired database type by clicking the Project Target Database drop-down button and selecting the desired option from the list.
If you selected the Janitza DB database, click the Finish button to complete the import process.
If you selected the MS-SQL or MySQL database, configure the database connection and then click the Finish button.