Integrating and changing a project
Valid for
|
GridVis editions |
Software platform |
|
|
|

![]()
Integrating a project into GridVis Web
After you have created a project in GridVis Desktop, you can integrate it into GridVis Web. Proceed as follows to do so:
Open the Navigation menu and click the menu item Settings and then the menu item System.
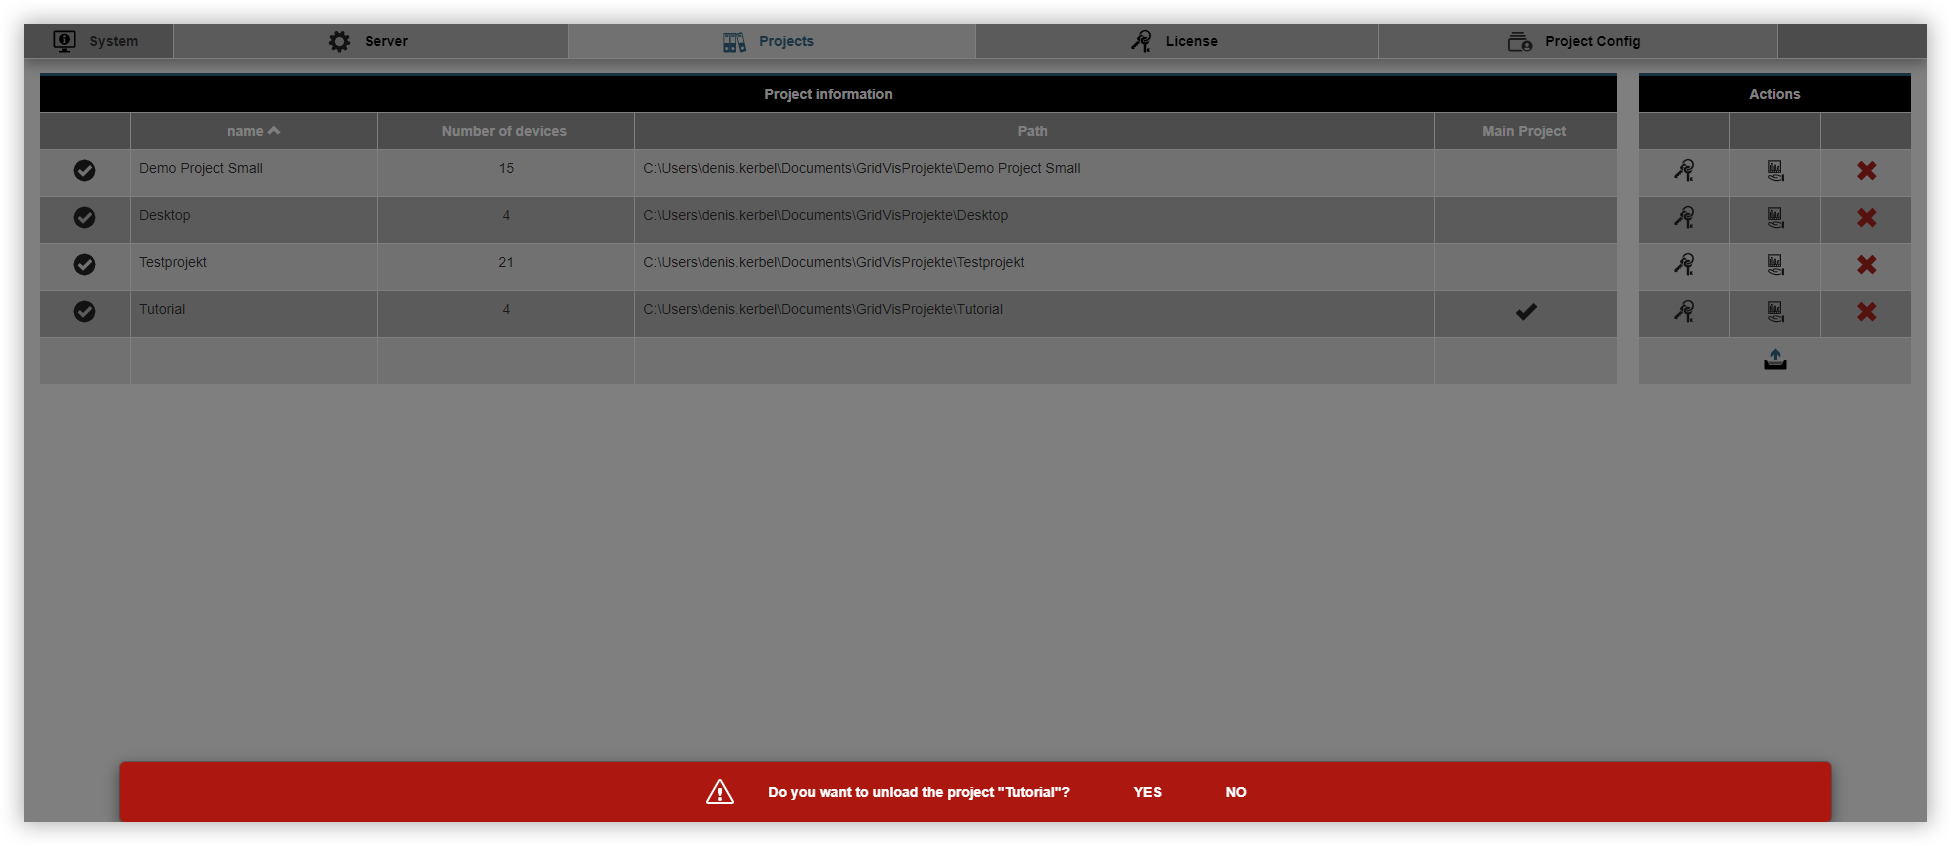
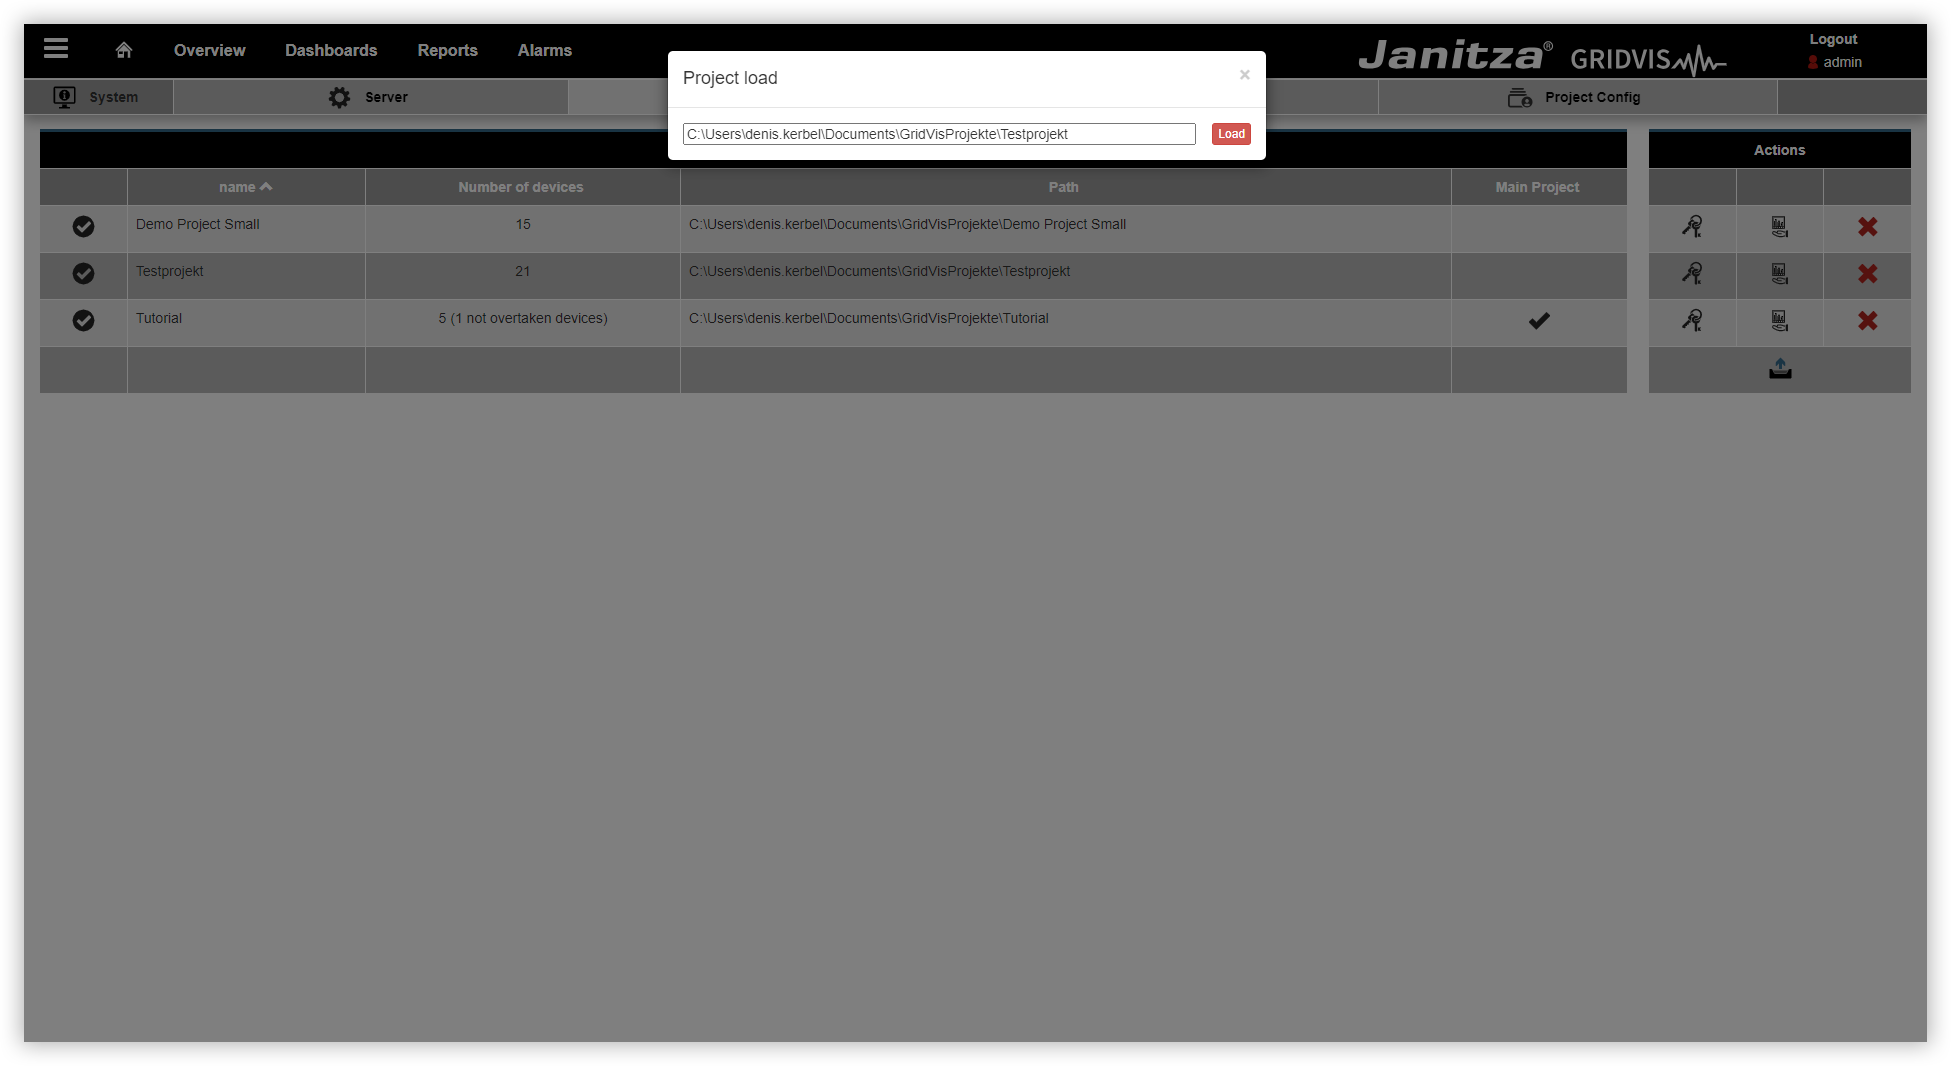
The Server window opens. Here, click the Projects tab.
Click the Upload button.
The Load project window opens. Copy the project path into the input field and click the Load button. You can find the project path in the Overview window of the project in GridVis Desktop.
Click the Restart server button to complete the integration of the project.
Your project has been successfully set as the main project and can now be used.
Assigning the devices
You can let GridVis Web manage your devices. The service then takes over automatic actions such as reading out the devices. Proceed as follows to have GridVis Web manage your devices:
Open the Navigation menu and click the menu item Settings and then the menu item System.
The Server window opens. Here, click the Managed measurement devices button.
A warning message is displayed at the bottom of GridVis Web. Here, click the Yes button.
The devices have been successfully assigned to GridVis Desktop. You can now perform device actions without starting GridVis Desktop.
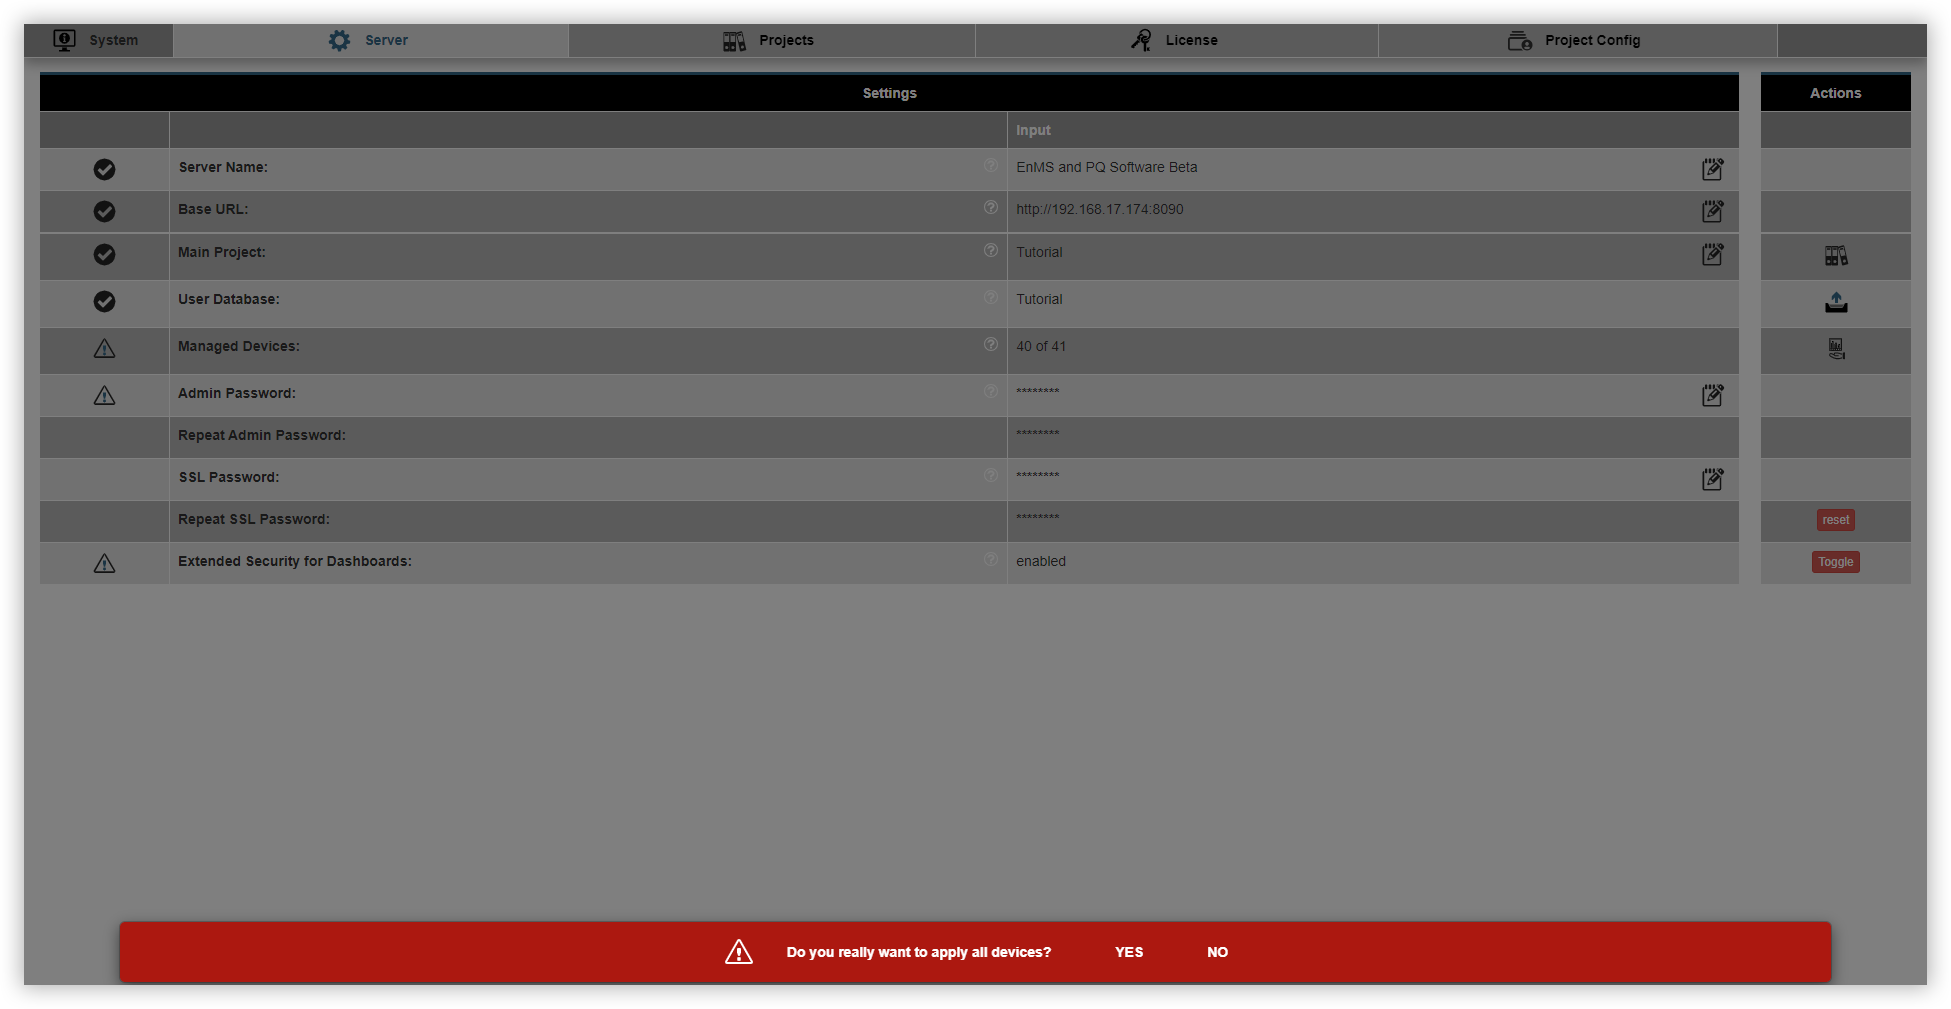
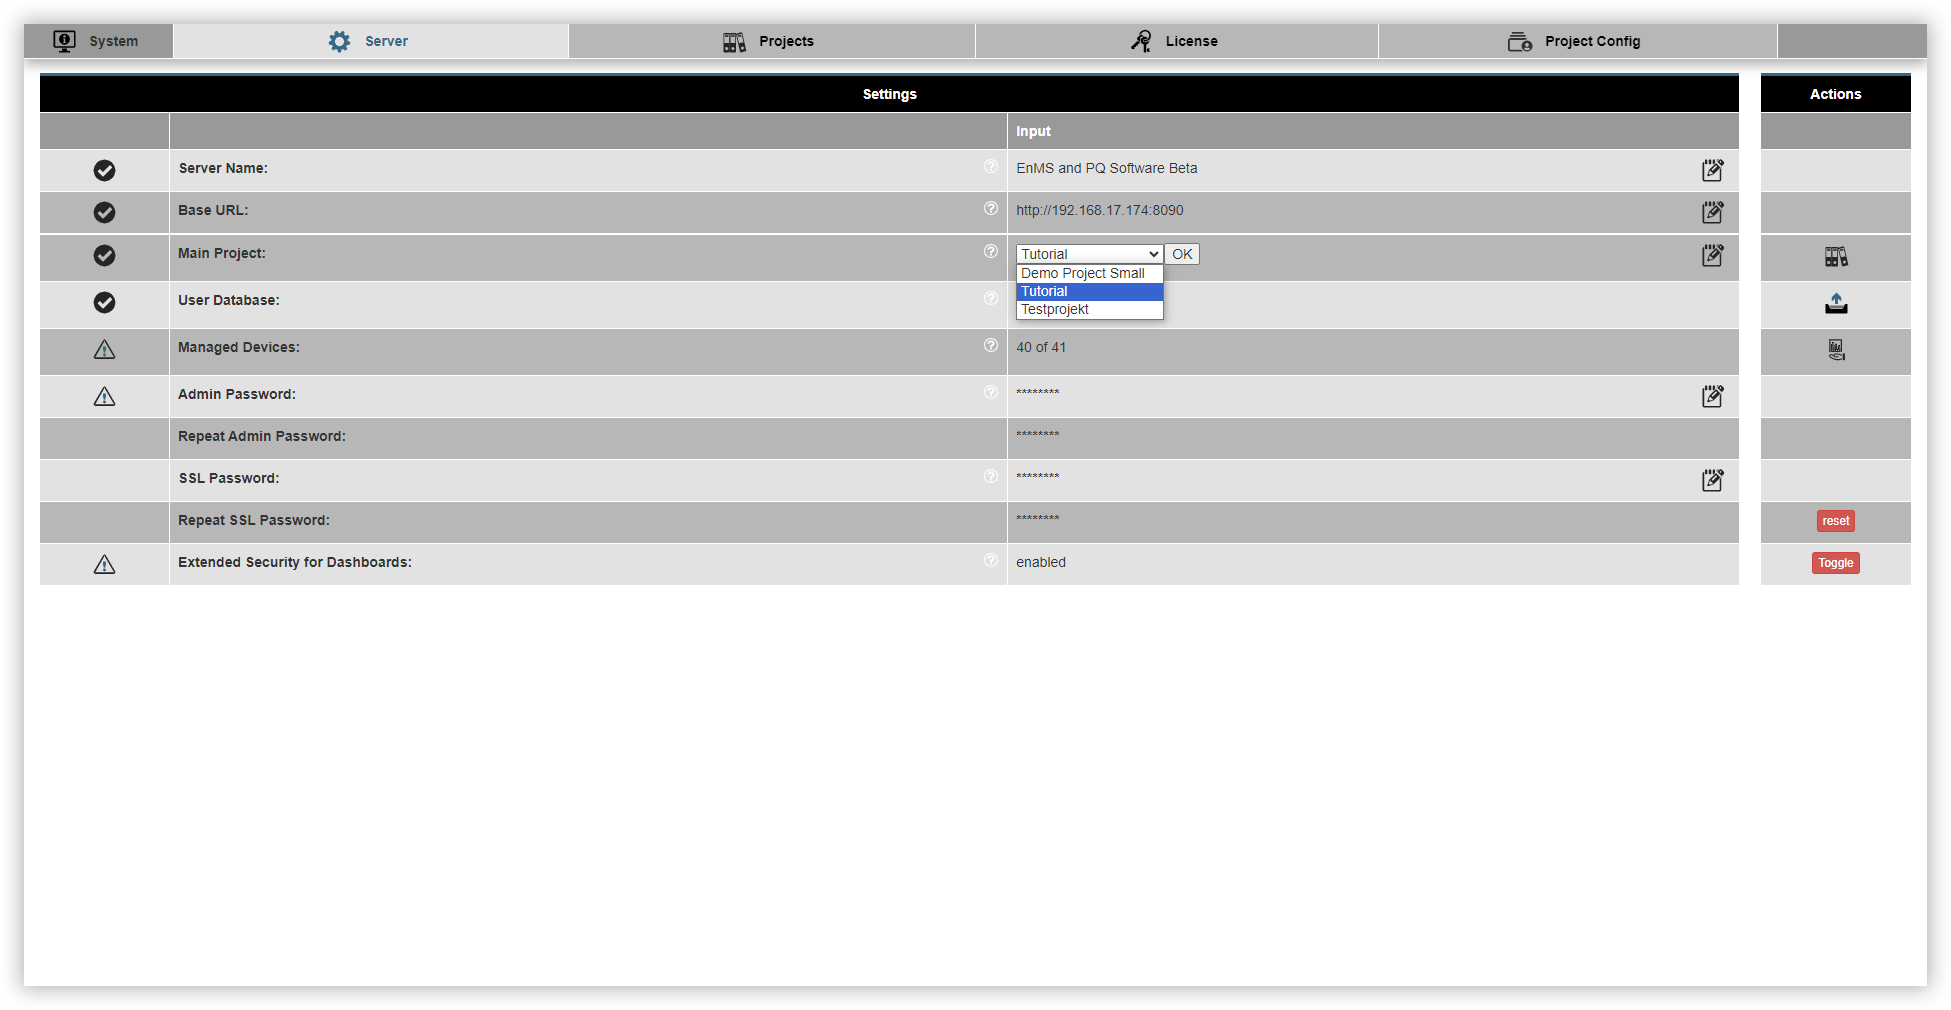
Changing the main project
Only one main project can be used in GridVis Web at a time. Proceed as follows if you want to use another project as the main project:
Open the Navigation menu and click the menu item Settings and then the menu item System.
The Server window opens. Click the Change main project button.
Select the desired project from the drop-down list and click the OK button.
A warning message is displayed at the bottom of GridVis Web. Here, click the Yes button. GridVis Web is then restarted.
Your main project has been successfully changed and can now be used. Note that the devices must be reassigned so that GridVis Web is able to read the devices.
Remove project
You can remove your projects at any time. Proceed as follows if you want to remove one of your projects from GridVis Web:
Open the Navigation menu and click on the menu item Settings and then click on the menu item System.
The Server window opens. Here, click the Projects tab.
Click on the button Unload project.
A warning message is displayed at the bottom of GridVis Web. Here, click the Yes button.
The project has been successfully removed from GridVis Web. Please note that the project has only been removed from GridVis and not completely deleted. The project and the associated project files remain saved.
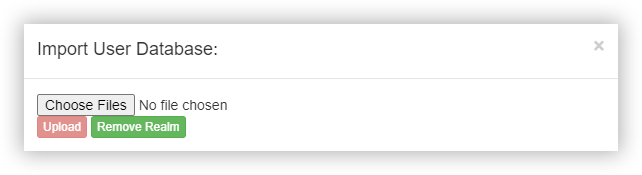
Note
Please note that your user database will remain active. You must remove your user database manually.
Open the Server tab.
Click on the button User database.
The Import user database window opens.
Finally, click on the Remove realm button to remove your user database.