Device overview
Valid for
|
GridVis editions |
Software platform |
|
|
|

![]()
|
Pos. |
Description |
|
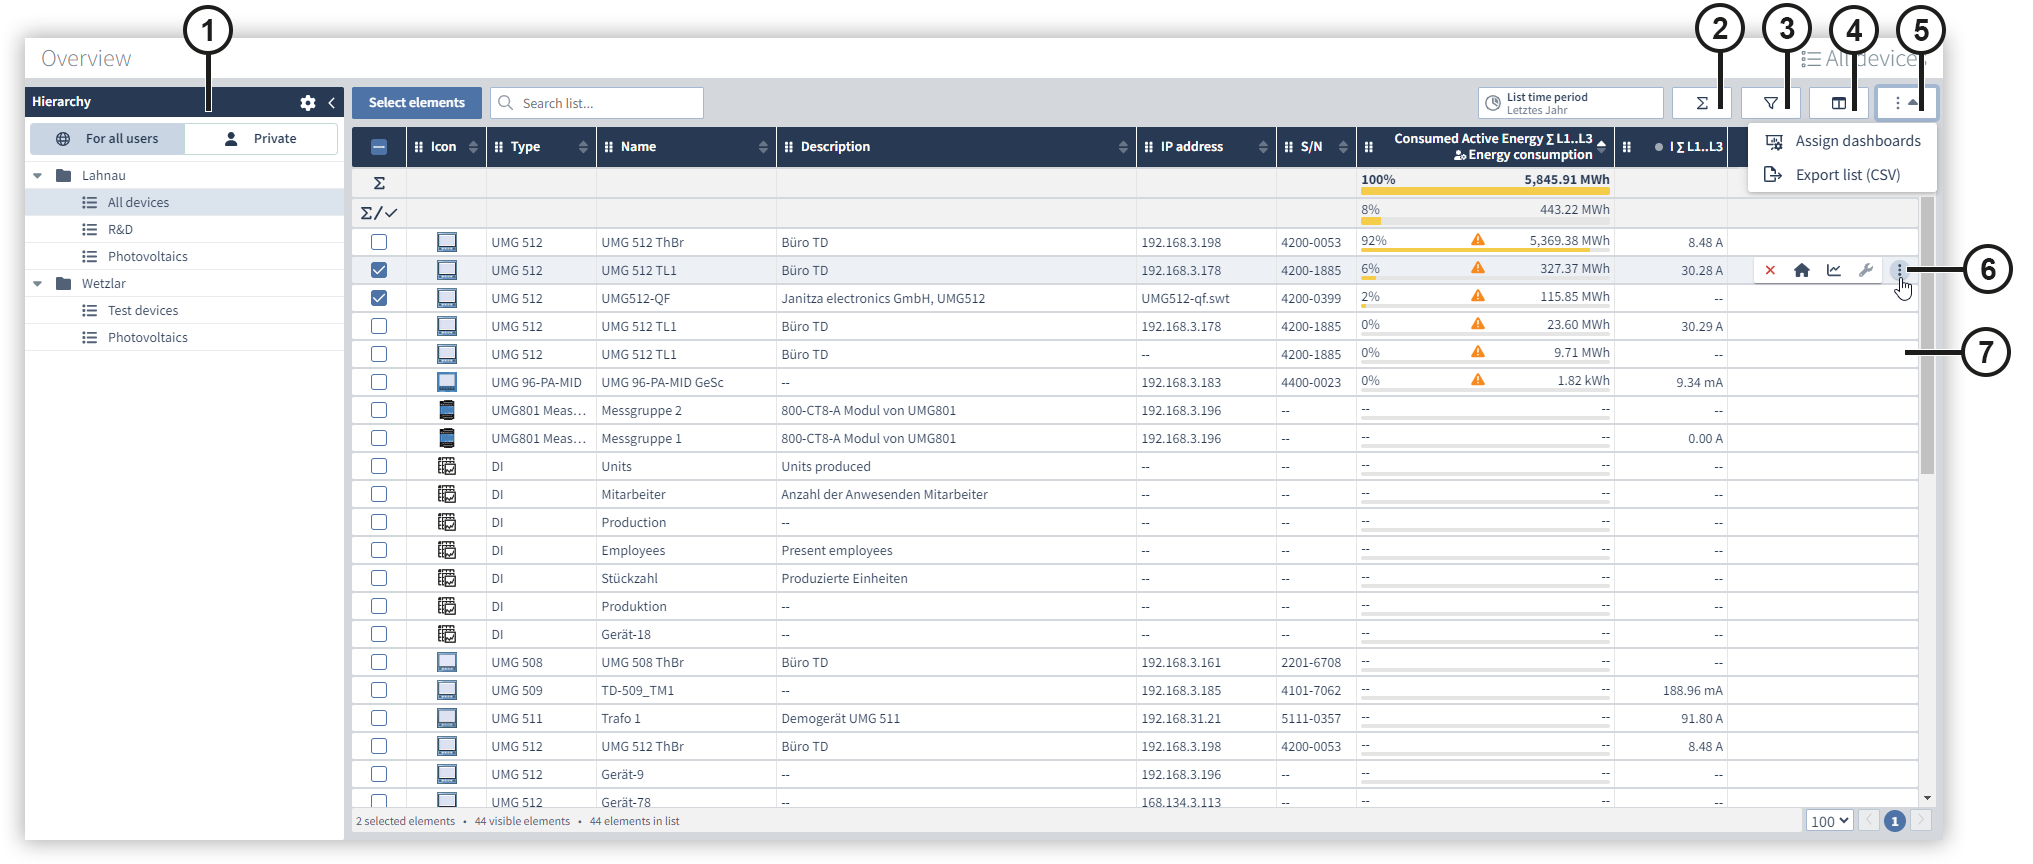
1 |
Hierarchy Your public and private lists are displayed in the hierarchy. Public lists are visible to all users, private lists are only visible to you. Proceed as follows to create a new list:
Once you have created a folder or list, you can move it between the public and private areas using drag & drop. Please note that when moving from the public to the private area a copy is created. When moving from the private to the public area, no copy is created and the element is moved directly. Click on the trash can icon in the recycle bin to permanently delete the item. |
|
2 |
Consumption analysis Click on the totals icon to show or hide the consumption analysis. The consumption analysis shows you the consumption of all devices and the total consumption of your selected devices. The consumption of the individual devices is also displayed in the list. You can use either relationship bars or proportion bars to display the overview. Relationship bars show the relationship to the largest value, while proportion bars show the relationship to the total. The proportion and relationship bars can be configured in the column selection. |
|
3 |
Filter selection In the filter selection, you can configure your desired filters to filter your device list according to certain properties. Click on the filter icon to open the filter selection. By default, only filters for the configured columns of the device list are displayed. However, you can also use the slider to display all filters. |
|
4 |
Column selection You can configure the columns displayed in the device list using the column selection. Proceed as follows to add a new column to the device list:
The graphical display of the consumption analysis can also be configured in the column settings for energy sources. |
|
5 |
Assigning dashboards When creating a Dashboards you can mark it as a template and then assign it to one or more devices. Proceed as follows to assign a dashboard template to your devices:
Please note that it is not possible to assign old dashboard templates (prior to GridVis version 9.0.0) to multiple devices at the same time. Exporting a list (CSV)
The list is downloaded in CSV format with the columns displayed. |
|
6 |
Three-point menu You can display the three-point menu by hovering over one of your elements with the mouse pointer. The following functions can then be displayed by subsequently clicking on the three-dot menu:
Please note that it is not possible to assign old dashboard templates (prior to GridVis version 9.0.0) to multiple devices at the same time. |
|
7 |
Click on a row to open the dashboard template assigned to the element. If no templates are assigned, the GridVis templates are displayed. |