Dashboards without authentication
Valid for
|
GridVis editions |
Software platform |
|
|
|

![]()
Description
Dashboards can be shared via a link and, for example, be published on an Intranet. This makes them accessible to users without a GridVis login.
Note
When a logged-in GridVis user opens a shared dashboard link, the dashboard is displayed in the user's view.
You cannot link to the following elements from a shared dashboard:
Non-shared dashboards
Shared dashboards whose devices are replaced when opened
Non-public URLs
Share dashboard
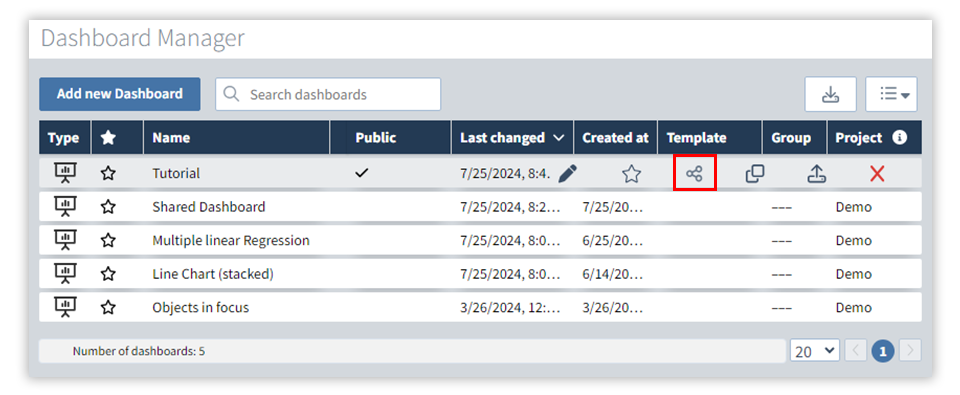
Fig. 1: Share dashboard in the Dashboard management
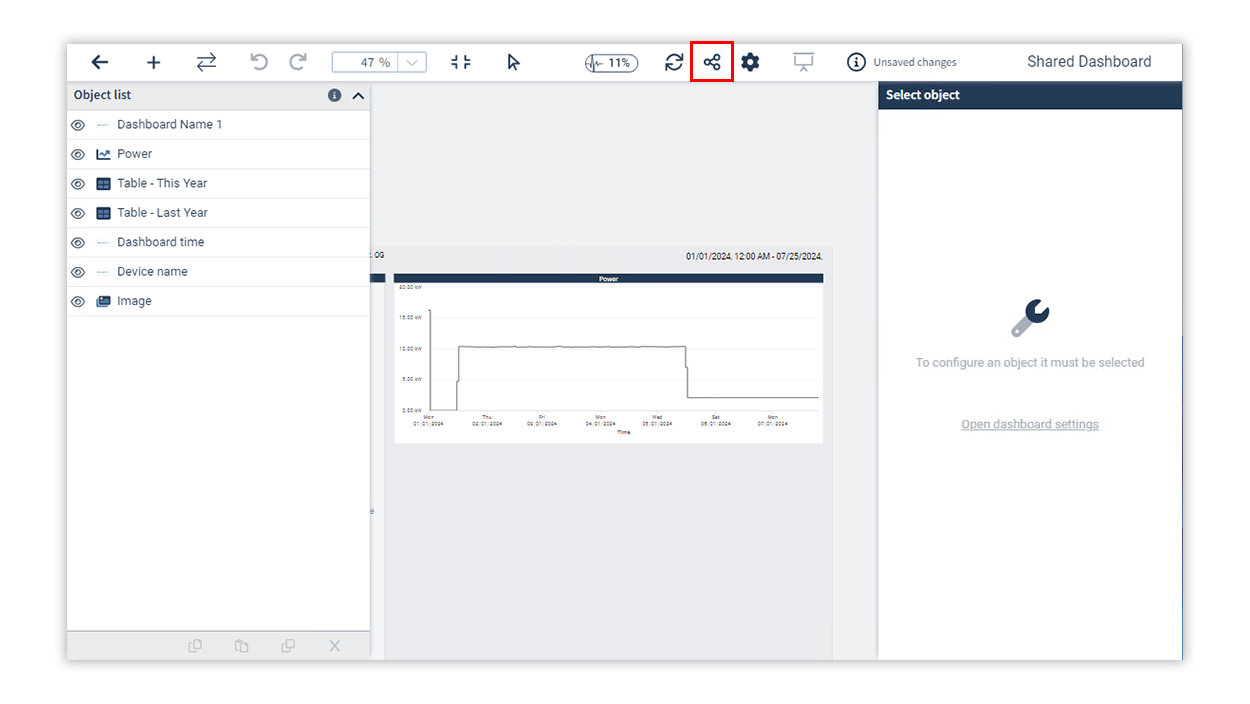
Fig. 2: Share dashboard in the Dashboard editor
In the Dashboard Manager (Fig. 1) or in the toolbar of the Dashboard editor (Fig. 2), click on the icon Share dashboard in the row of a dashboard.
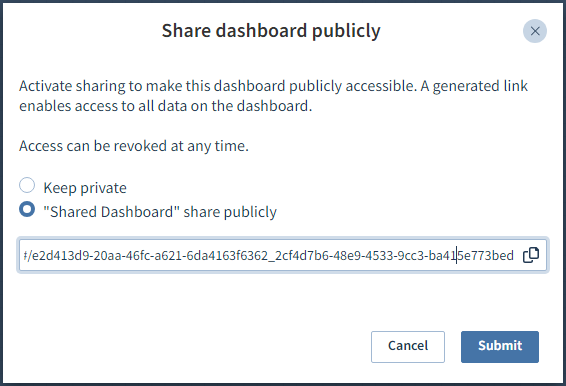
In the window Share dashboard publicly, select the option "(Name of the dashboard)" share publicly.
Copy the link that is displayed below this to share it and click on Submit. The link is static and does not change if the share is revoked and granted again.
A check mark appears in the column Public. The dashboard has been shared.
Show shared dashboard
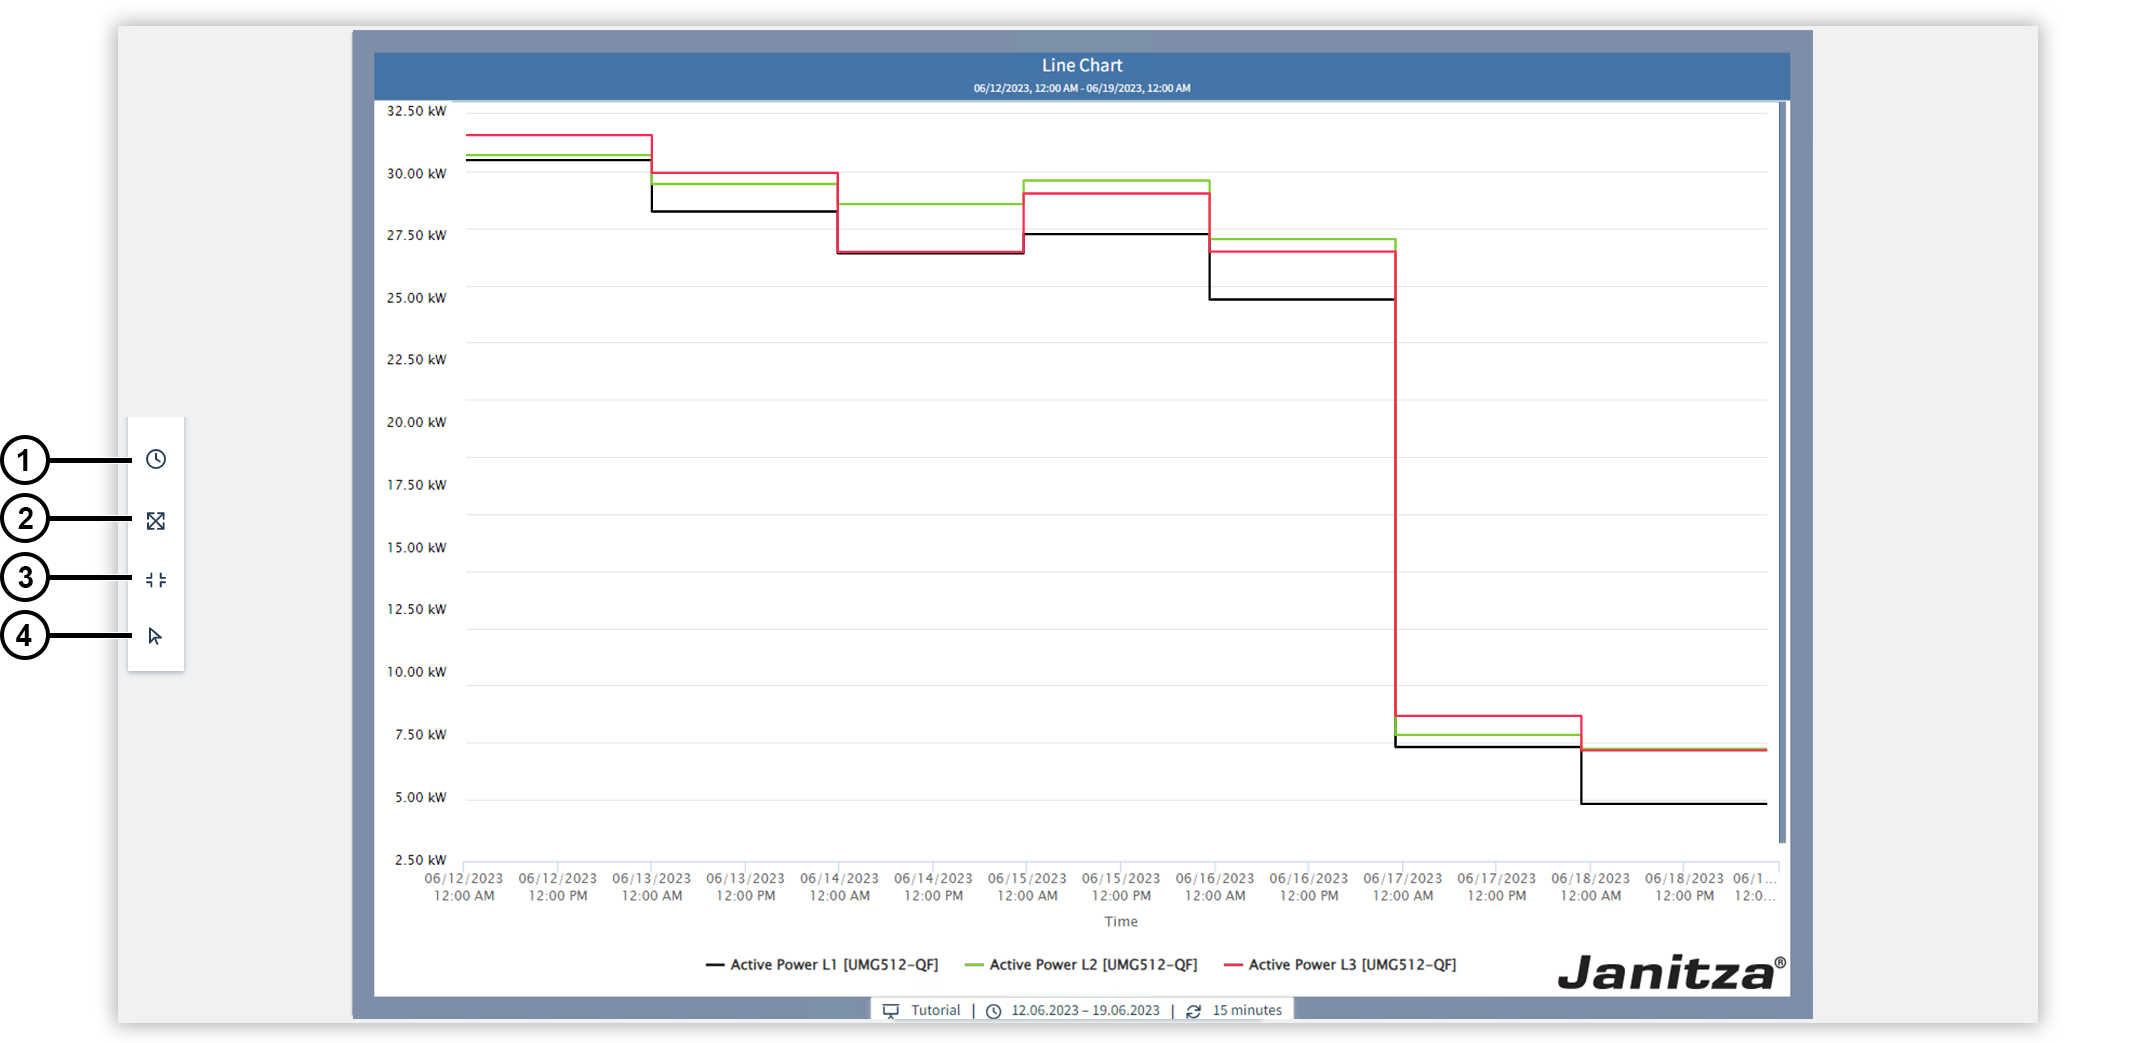
You can use a shared dashboard link to display a dashboard in presentation mode without a GridVis login.
|
Position |
Description |
|
1 |
Changes the time setting. During the dashboard presentation you can change the settings of the displayed time. This change applies to all objects in the dashboard for the duration of the presentation. In the object settings, you can exclude individual objects from having the displayed time changed. |
|
2 |
Displays the dashboard in full screen mode. |
|
3 |
Adjusts the dashboard to the window size so that it completely fills the display area. |
|
4 |
Switches the panning mode. The mouse icon indicates that you are interacting with the objects on the Dashboard. The hand icon means that you are navigating in presentation mode. |