GridVis Cloud
CloudBridge makes it possible for you to use the devices in your project in the GridVis Cloud as well. The GridVis Cloud is an energy monitoring system for the quick and easy analysis and visualization of energy consumption. The extensive functions of the GridVis Cloud include interactive dashboards, evaluation of energy consumption and detection of extreme values as well as comparison of time periods and locations.
Please note that you must create a project in the Cloud before linking GridVis Web and GridVis Cloud. How to create a project and further information on the Cloud can be found here .
Setting up a Cloud connection
Proceed as follows to connect your project from GridVis Web to the Cloud:
Click on the button Link GridVis Cloud license.
Select whether you want to continue with the current user or select a different user.
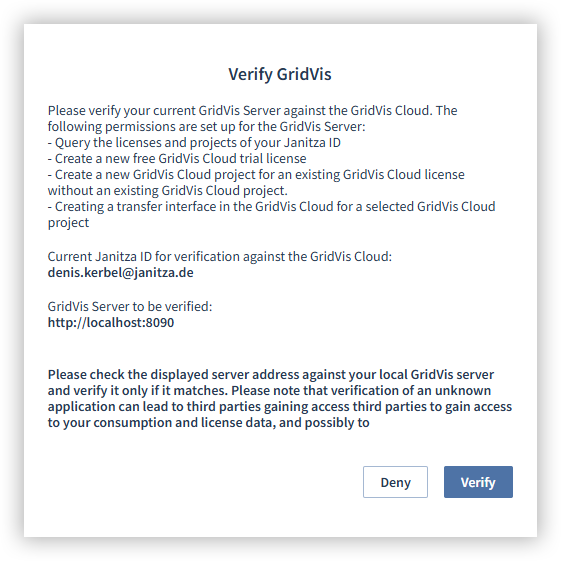
Check that the correct server is connected to the Cloud. If it is the correct server, click on the button Verify. If it is the wrong server, call up the correct server and start the process from the beginning.
Select the Cloud license to which GridVis is to be linked and click on the button Accept.
Note
Only verify the server if there is a match. An incorrect server indicates an attempt at fraud and your consumption and license data could be misused!
You can disconnect from the GridVis Cloud at any time. To do so, click on the Disconnect button. Please note that although live data are then no longer sent to the Cloud, the historical data are still stored in the GridVis Cloud.
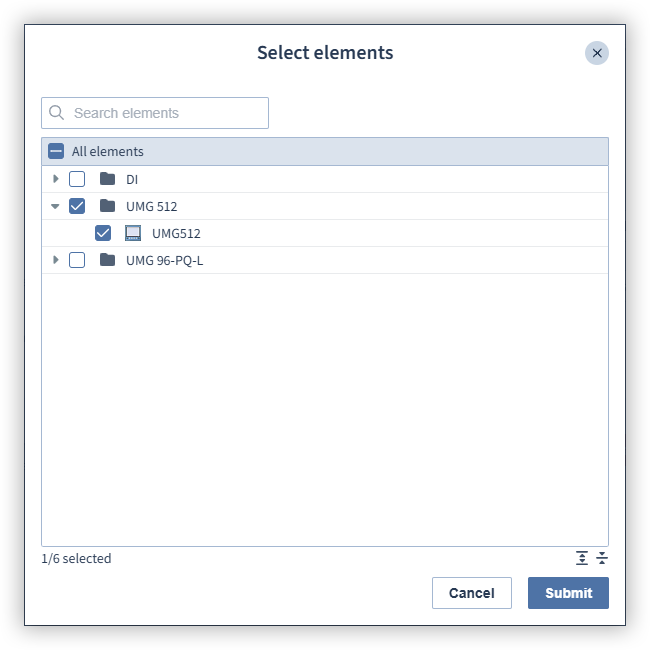
Device selection
Click on the Select devices button and select the devices you want to manage in the GridVis Cloud. Then click the Confirm button.
After reading out the historical data of your devices with GridVis desktop, you can transfer the consumption data of your devices to the GridVis Cloud and display the consumption curves graphically. Proceed as follows to transfer the historical measurement data to the GridVis Cloud:
Click on the Read historical data button.
Select the devices whose historical data are to be transferred to the GridVis Cloud and click on the Confirm button.
Select the time period for which you would like to transfer the historical data to the GridVis Cloud. Please note that you must first read out the historical data of the devices using GridVis desktop!
Then click on the Transfer values button.
The progress of the transfer is displayed in the project configuration. Once the transfer has been completed successfully, the data can be displayed graphically in the GridVis Cloud.
Note
The device must already have been read out in GridVis so that the data can be transferred to the database and sent to the Cloud. To ensure that the Cloud regularly receives the latest data, there must be a schedule for automatic readout. You can find out how to read out your device and create a schedule for automatic readout here .