Energy Recording Report


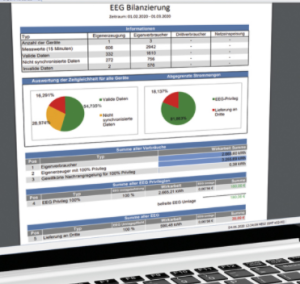
Practical example of an energy recording report
Example of a report according to the German Federal Network Agency
Comparison of measured values between the energy recording report and meters


Valid for

GridVis Editions

Software platform

images/download/thumbnails/251036916/GridVis_Icons_Standard_Expert-version-1-modificationdate-1615282602000-api-v2.png

images/download/thumbnails/251036916/gv_desk-version-1-modificationdate-1611649682000-api-v2.png


Description

In combination with the corresponding measurement points (e.g. UMG 96PA-MID+), the energy recording report (ZSG report) assists you with electricity quantity delimitation for the exemption from the EEG apportionment. The report takes into account the delimitation of self-consumers or third-party consumers as well as the voluntary subordination rule.

The report includes:

  • An evaluation of the quarter-hourly measured values.

  • A listing of all quarter-hourly measured values of all devices over the report period (maximum 1 year)

  • Up to 5 user-defined German Renewable Energy Sources Act (EEG) privileges

  • A listing and set-off of all consumptions, subdivided into the respective privileges

  • Sum of exempt and payable EEG apportionment amounts

  • An overview of the delimited amount of electricity

  • A clear evaluation of the status of the individual 15 min. values (valid, invalid, not synchronized)

  • Graphical and tabular representation of self-consumption, self-generation and privileged consumption on a monthly basis


images/download/thumbnails/251036916/image2021-1-26_12-58-34-version-1-modificationdate-1611662315000-api-v2.png


Note

For more information on the EEG apportionment reduction, please visit the Janitza Homepage or visit one of our web seminars . A simple explanation of the EEG apportionment is also given in our video opposite.

images/download/attachments/251036916/EEG-Animation-Video-version-1-modificationdate-1611827060000-api-v2.jpg


Note

The configuration of the Energy recording report requires recorded values (historical values) from your meters and the corresponding measured value type!

Creating the Energy recording report

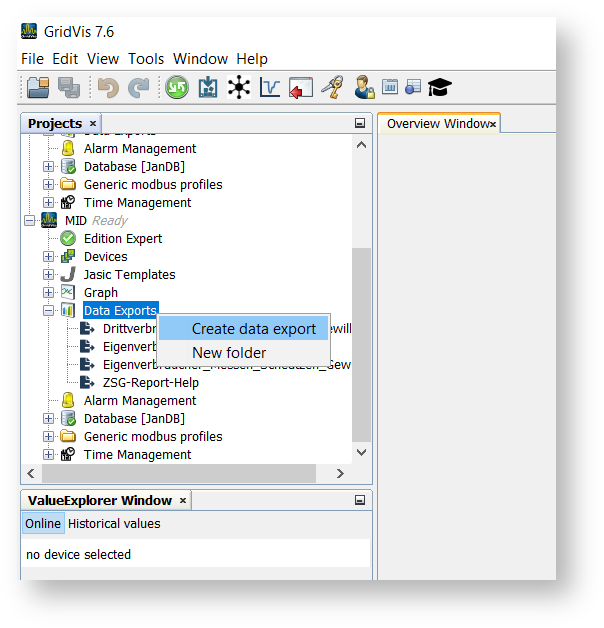
To be able to generate an energy recording report, a corresponding data export must be configured in GridVis.

  • Right-click the Data export directory in the Projects window and click the Create data export item in the context menu that appears.

  • The Configure new data export wizard will start.

Optionally, you can also edit an existing data export.

images/download/attachments/251036916/Datenexport_Start_en-version-1-modificationdate-1615213529000-api-v2-effects-drop-shadow.png


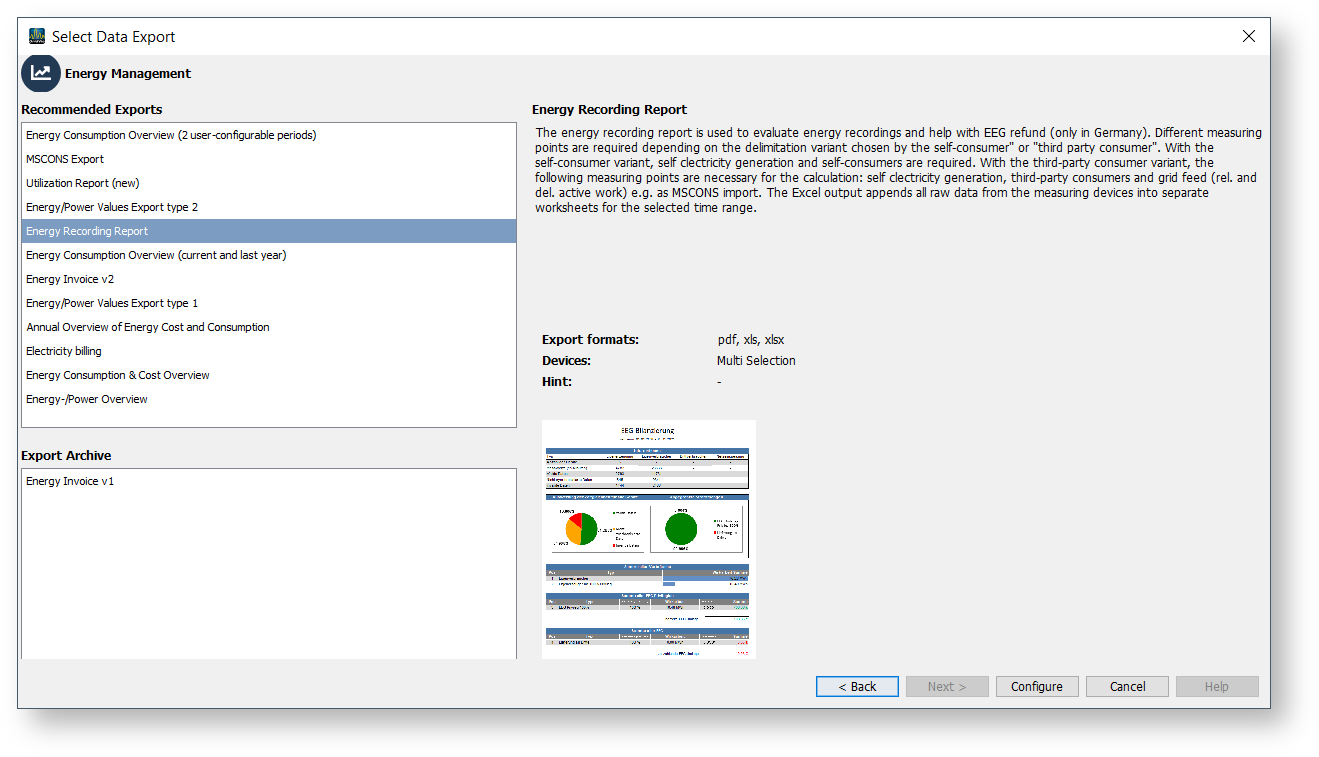
Select the data export rubric

  • Select the Energy management rubric.

  • Confirm your selection via the corresponding button.


images/download/attachments/251036916/Datenexport_Start_Export_Gruppe_en-version-1-modificationdate-1615213539000-api-v2-effects-drop-shadow.png

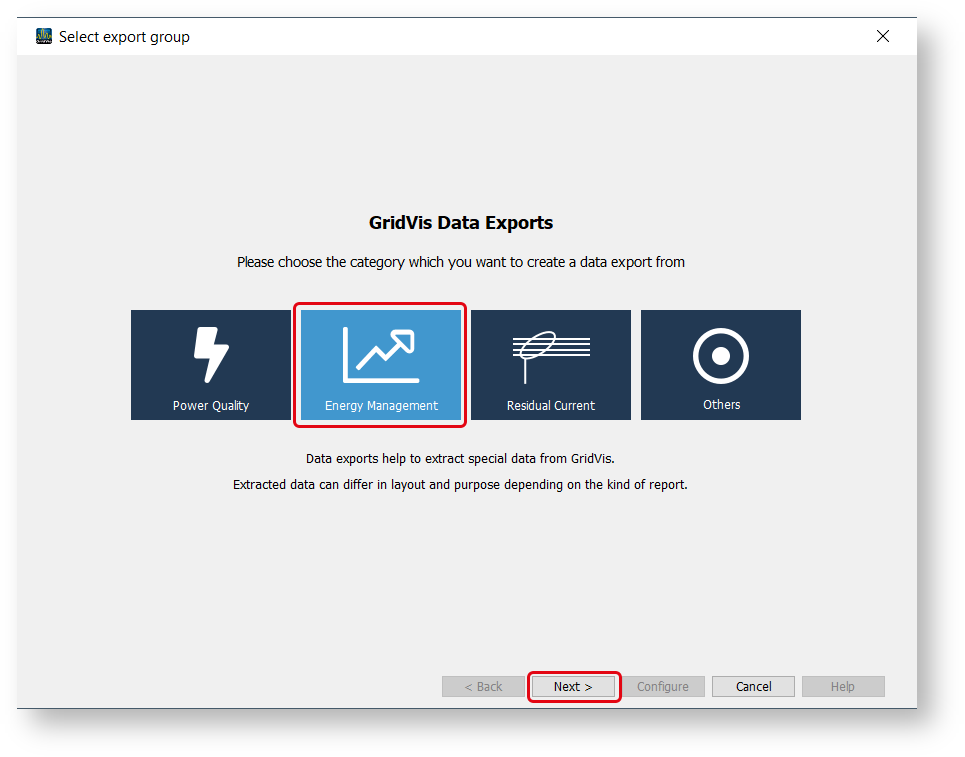
A list of available data exports is displayed.

  • Select the Energy recording report.

  • Use the corresponding button to configure the data export.

Use the following steps to configure the data export according to your application.

images/download/attachments/251036916/Datenexport_Auswahl_ZSG_en-version-1-modificationdate-1615213585000-api-v2-effects-drop-shadow.png


Meter reading report configuration

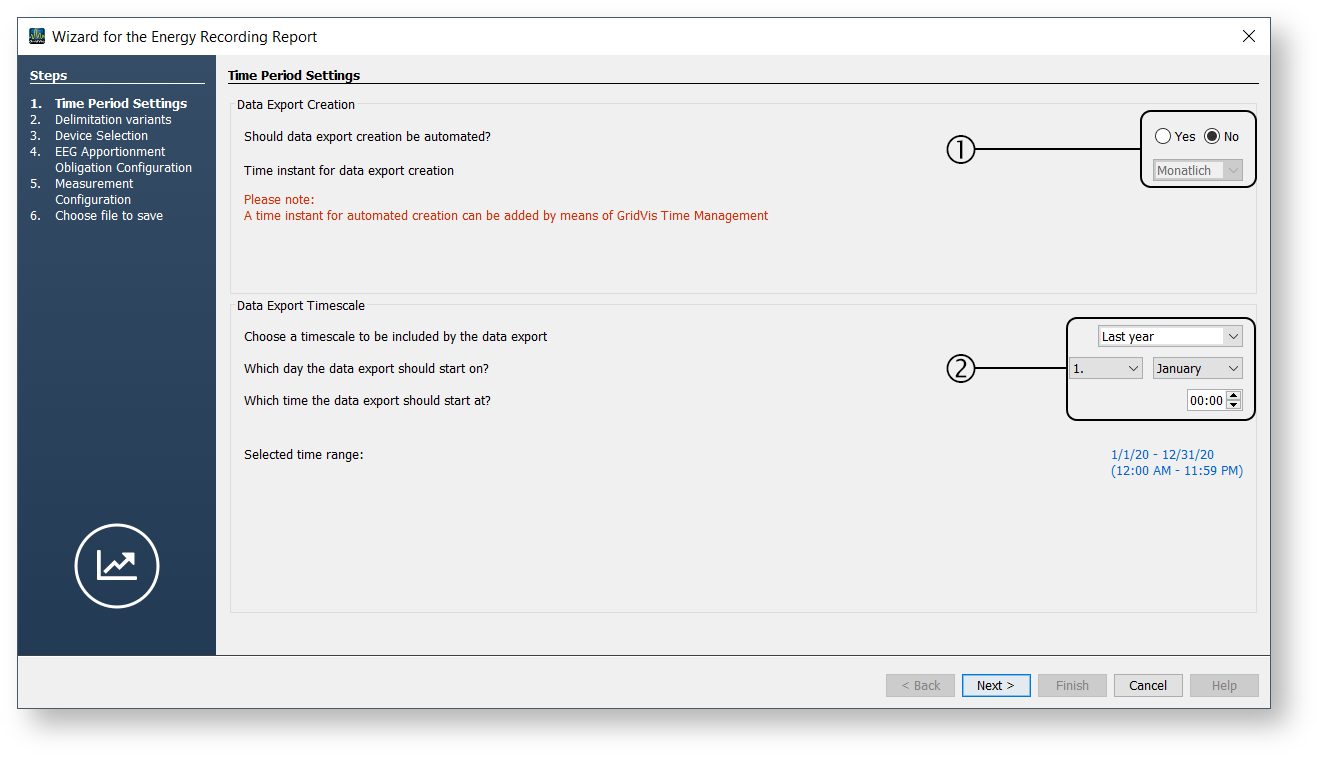
1st step Period settings:

Position

Description

1

Data export creation

  • If you want the data export to be created automatically, select the corresponding radio button.

  • Use the pull-down menu to specify the defined time instant for the automatic data export. For information on how to define individual time instants, see Scheduling (GridVis Desktop) and Scheduling (GridVis Web)

2

Data export time range

  • Specify the period and the start date (day and time) of the data export.
    For the energy recording report, the period selected is usually the last year and the start date is January 1 at 00:00.

Note

Creating the report can take several minutes due to the large amount of data involved. The time depends on the scope of the project.

images/download/attachments/251036916/ZSG_konfig_1_Zeiraum_O_en-version-1-modificationdate-1615213627000-api-v2-effects-drop-shadow.png


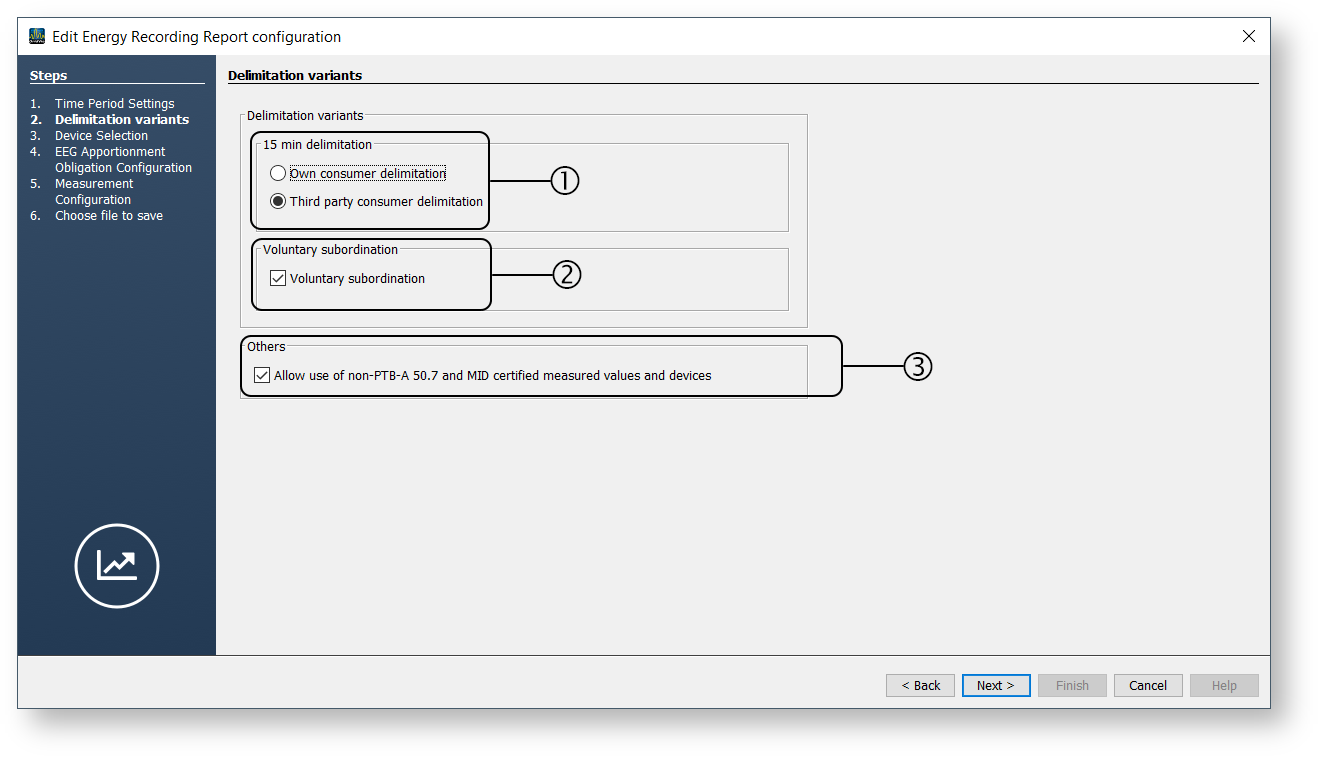
2nd step Selection of the delimitation variants:

Position

Description

1

Delimitation variants

Choose one of the following delimitation variants in accordance with your measurement concept:

  • Self-consumer delimitation

  • Third-party consumer delimitation

2

Voluntary subordination rule

  • Select this checkbox if you want to consider third-party consumers according to the voluntary subordination rule.

3

Other

  • Select this checkbox if you also want to use measurement devices for evaluation that are not certified according to PTB-A 50.7 and MID ( e.g. virtual devices, UMG 512, UMG 96RM-E, ...) .

images/download/attachments/251036916/ZSG_konfig_2_Abgrenzungsvarianten_O_en-version-1-modificationdate-1615213663000-api-v2-effects-drop-shadow.png


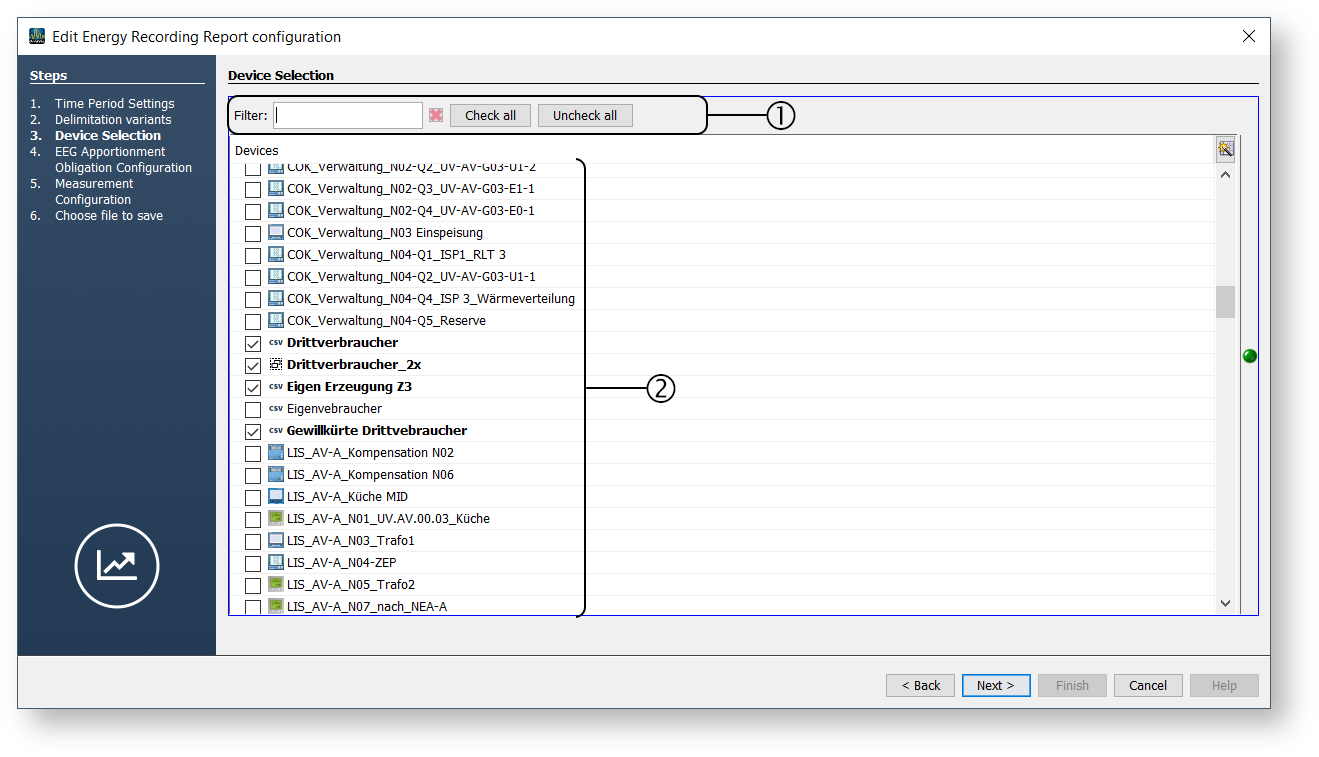
3rd step Device selection:

Position

Description

1

Filtering the meters

  • Search and sort function

  • Useful with a large number of meters

  • Select or deselect all devices

2

Selection of the meters

  • Select the required meters using the checkboxes. The selected devices are configured in a further step.

images/download/attachments/251036916/ZSG_konfig_3_Geraeteauswahl_O_en-version-1-modificationdate-1615213691000-api-v2-effects-drop-shadow.png


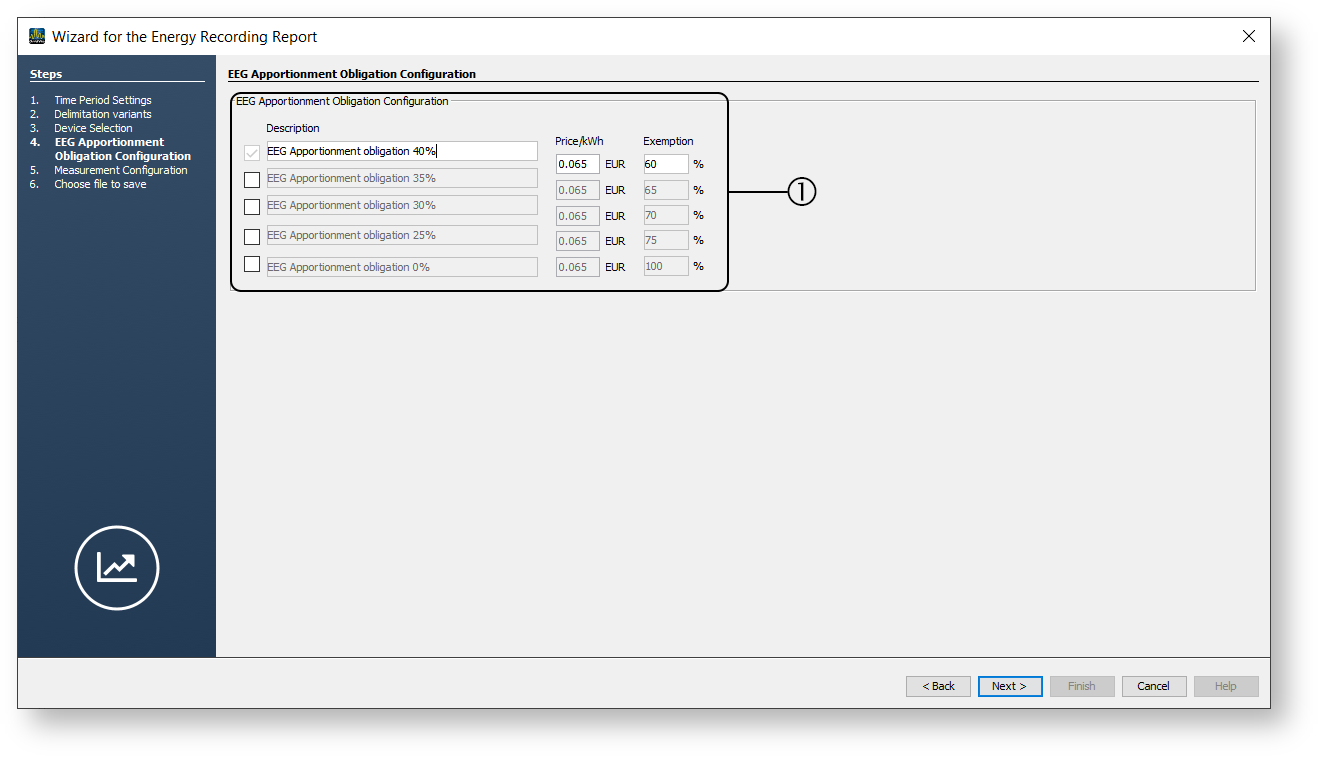
4th step EEG apportionment obligation configuration:

Position

Description

1

EEG apportionment obligation configuration

  • You can create a total of five different EEG privileges and assign them to the meters in a further step.

  • Specify a description, the price per kWh and the exemption rate of the privilege.
    The price entered for the EEG apportionment must be valid for the report period under consideration. The exemption rate must be at least 1%.

images/download/attachments/251036916/ZSG_konfig_4_EEGUmlagepflicht_O_en-version-1-modificationdate-1615213722000-api-v2-effects-drop-shadow.png


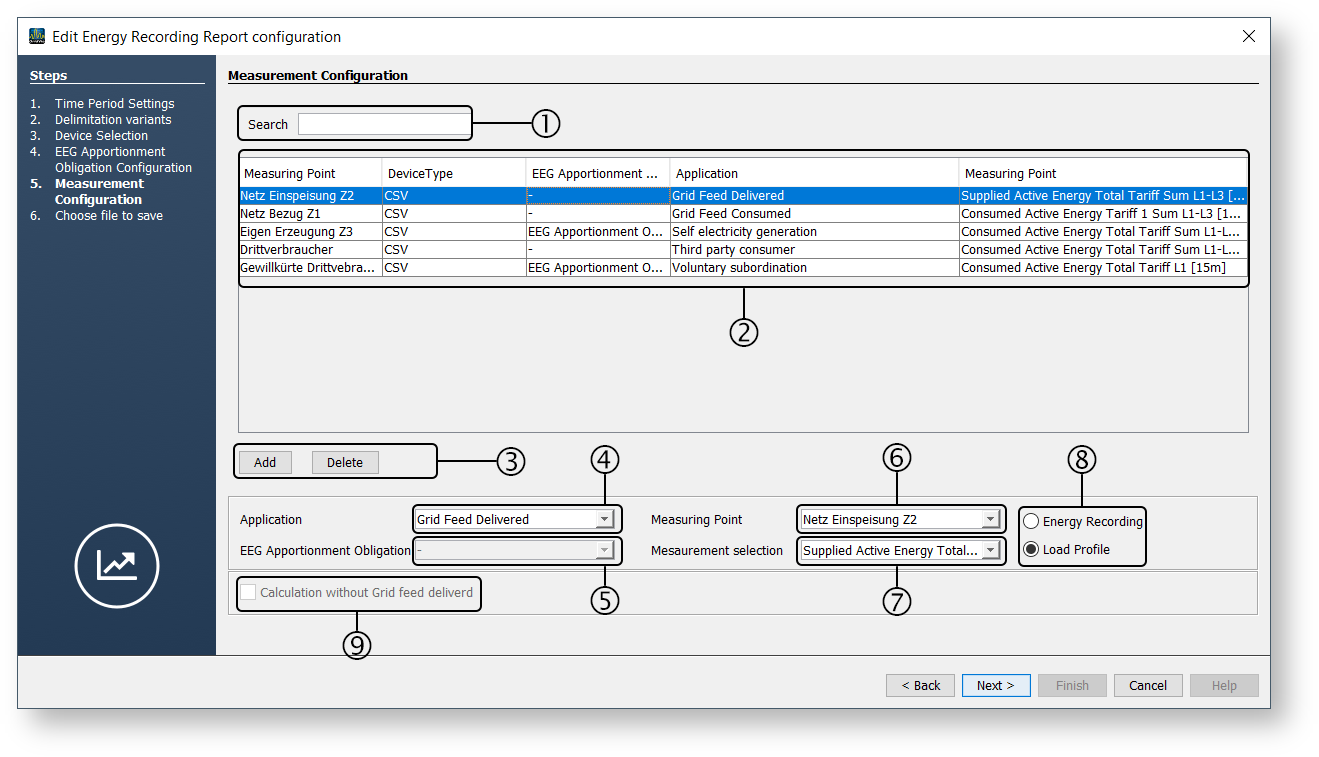
5th step Configure the measurement points:

Position

Description

1

Search

  • Search for measurement points by name.

  • Useful with a large number of meters

2

List of measurement points

  • Shows an overview of the measurement points with their configuration. The active measurement point is highlighted in color.

3

The Add and Delete buttons

  • Add a new position/measurement point to the list or Delete an existing entry.

4

Application

Select measurement point type:

  • Self-generation

  • Self-consumer

  • Grid feed delivered

  • Grid feed consumed

  • Third-party consumer

  • Voluntary subordination rule

Depending on your measurement concept (e.g. self-consumer or third-party consumer delimitation), not all items are always selectable.

5

EEG apportionment obligation

  • Assignment of one of the defined EEG privileges

6

Measurement point

  • Select measurement point / meter.

7

Measured value selection

  • Select the measured value of a measurement point / meter.

8

Measuring method

Select in which form the measured values are available:

  • Energy recording

  • Load profile (e.g. for CSV or MSCONS imports)

9

Calculation method

Activate this checkbox if youhave selected the self-consumer delimitation and no grid feed delivered has taken place.

images/download/attachments/251036916/ZSG_konfig_5_Geraetekonfig_O_en-version-1-modificationdate-1615213753000-api-v2-effects-drop-shadow.png


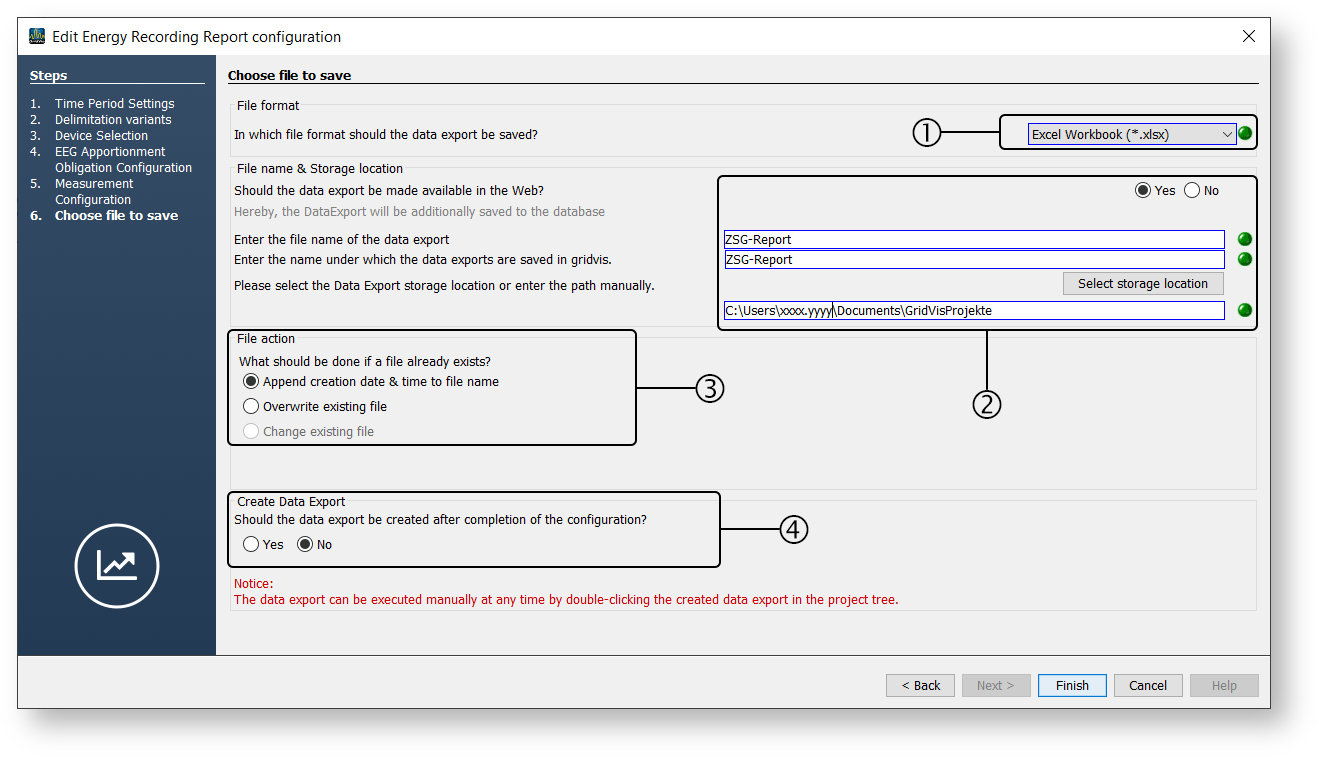
6th step Select file to save:

Position

Description

1

Report file format

You can choose the file format for the output of the energy recording report.

  • Excel workbook (*.xlsx)

  • Excel 97.2003 workbook (*.xls)

  • PDF file (*.pdf)

The output of raw data and calculation tables is supported only in the Excel formats.

2

File name and location

  • If the report should also be available in GridVis Web, select the corresponding radio button.

  • Enter the file name of the data export.

  • The field in the GridVis application for the name of the data export is automatically filled with the file name. Optionally, modify this display name via the input field.

  • Use the button to select a storage location for the data export or enter the path of the storage location in the corresponding field.

3

File action

If the data export already exists, select a file action:

  • Append creation date & time to file name - Creates an additional data export.

  • Overwrite existing file - Overwrites an existing data export.

4

Create data export

If you want the energy recording report to be generated immediately after the data export is completed, select the corresponding radio button.

images/download/attachments/251036916/ZSG_konfig_6_Speichern_O_en-version-1-modificationdate-1615213784000-api-v2-effects-drop-shadow.png