Metering Point Management
Valid for
|
GridVis editions |
Software platform |
|
|
|

![]()
General description
UMGs, Modbus devices, data imports and other virtual metering points can automatically be added to and subtracted from each other in a virtual metering point. This allows energy consumption, currents and power values of different elements to be combined. Virtual metering points can be integrated, for example, in Dashboards or Reports .
The metering point management enables:
simple and automatic set-off of values.
easy location of devices in the virtual metering point to facilitate fault diagnosis.
a clear display of the devices and their types and status in the virtual metering point.
fast error detection thanks to the transparent and comprehensible calculation of the values.
The metering point management can be viewed as a simplified form of the Virtual device that, however, is limited to certain use cases such as summation.
The metering point management can be found under Management > Metering point management.
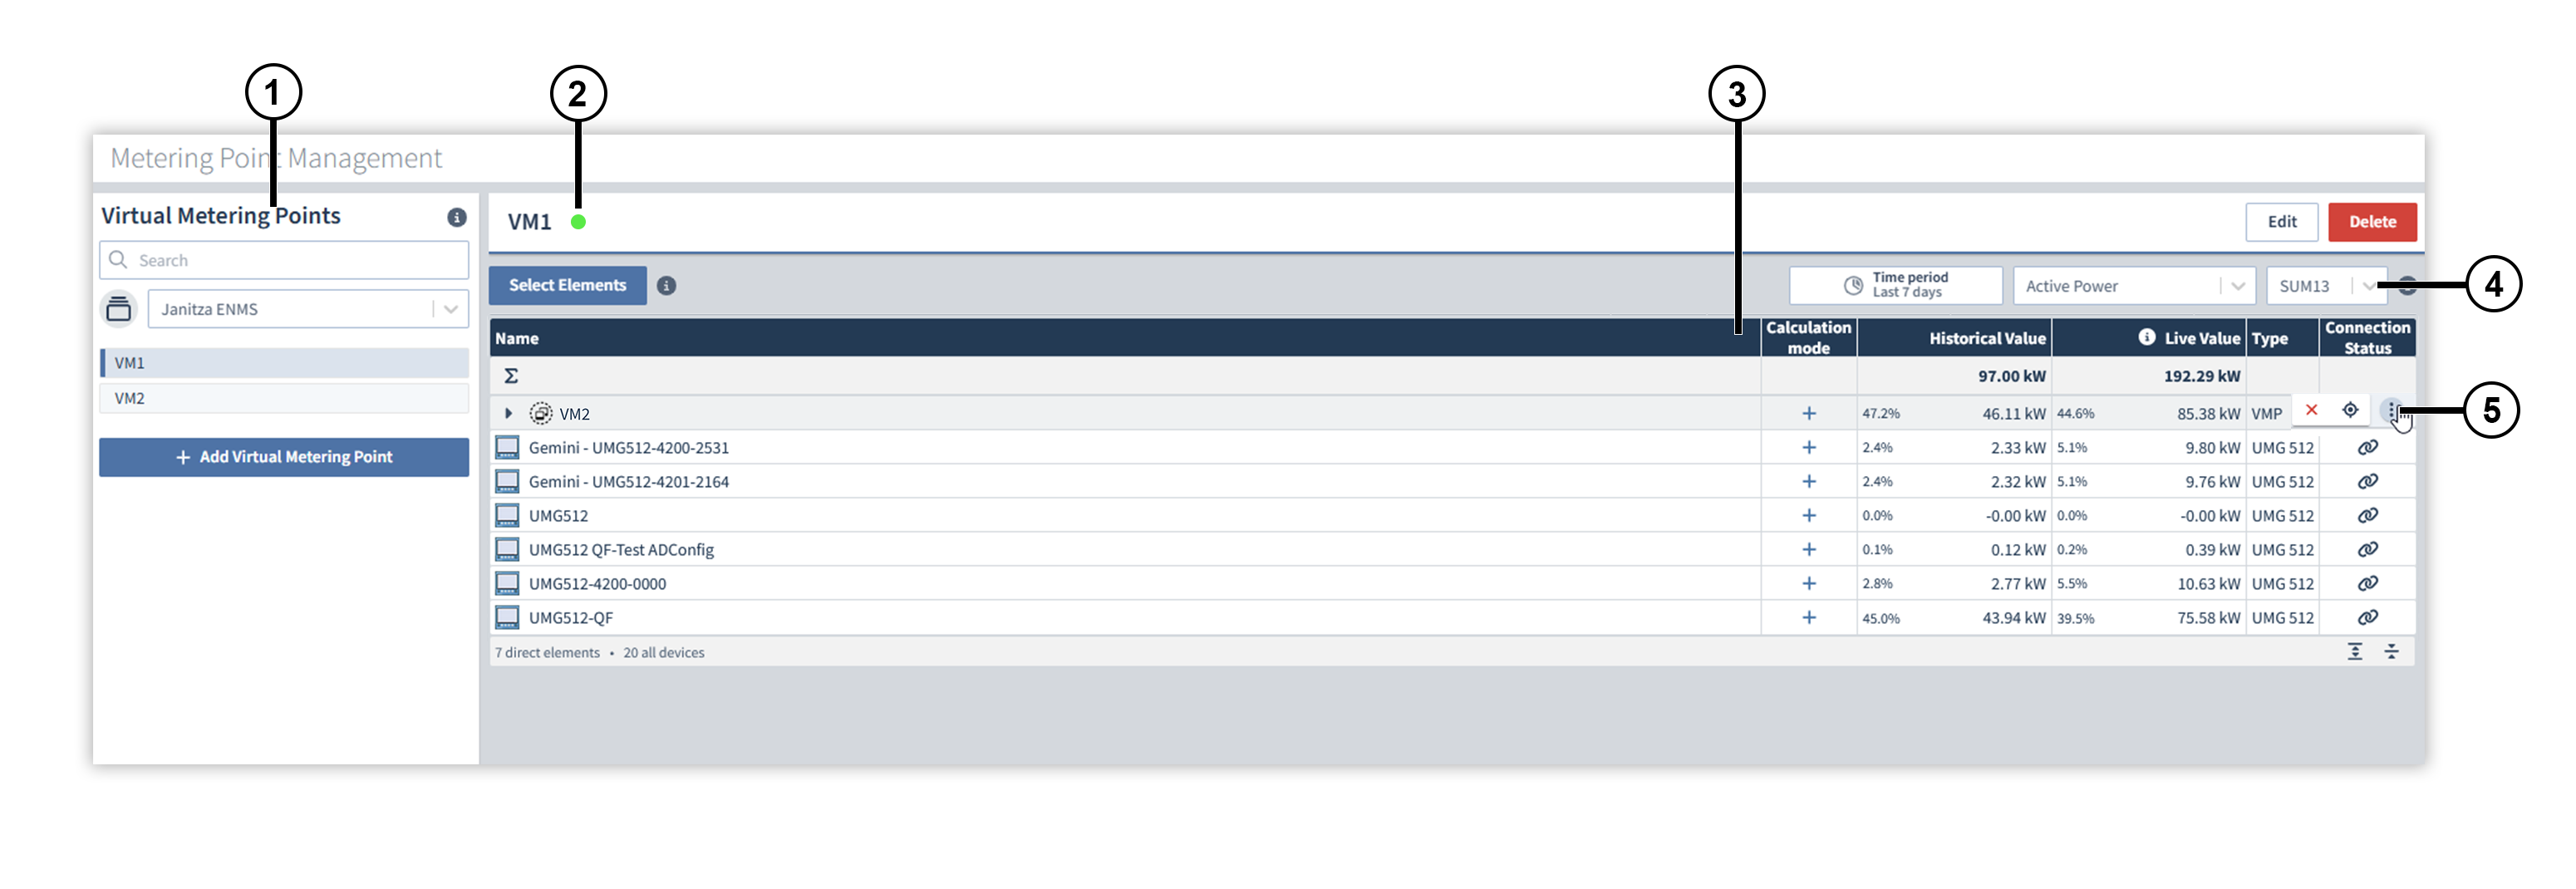
Overview window
|
Position |
Description |
|
1 |
Displays the virtual metering points per project. The search feature searches through all virtual metering points across all projects. |
|
2 |
Displays the status of the selected virtual metering point. For example, if an element in the virtual metering point has no connection, the status turns red. |
|
3 |
The calculation type can be changed by clicking on the plus or minus symbol. If a metering point is subtracted, the text turns red. |
|
4 |
Selects which phases are to be set off in the current view. In the editing window of the virtual metering point, you can select which phases are output and are therefore available here for selection. |
|
5 |
|
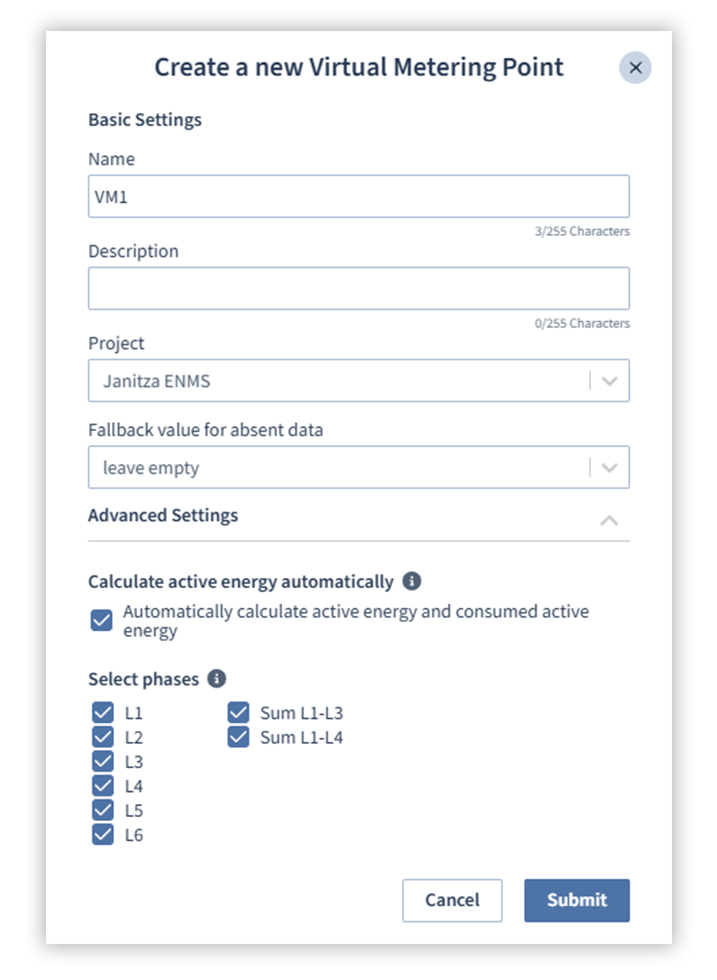
Creating and editing a virtual metering point
Click on the Add virtual metering point button to open the editing window.
Give the virtual metering point a name and, if required, a description.
Assign the virtual metering point to a project.
Select whether the value for missing data should be left blank or filled in with 0. This selection affects the calculation of average values and the visualization of data, e.g. on dashboards.
In the advanced settings, you can select:
whether active energy and consumed energy should be offset automatically,
and which phases are to be output in the virtual metering point.
Click on Confirm, to save the virtual metering point. Use the Edit button in the overview window of the virtual metering point to subsequently change the settings.
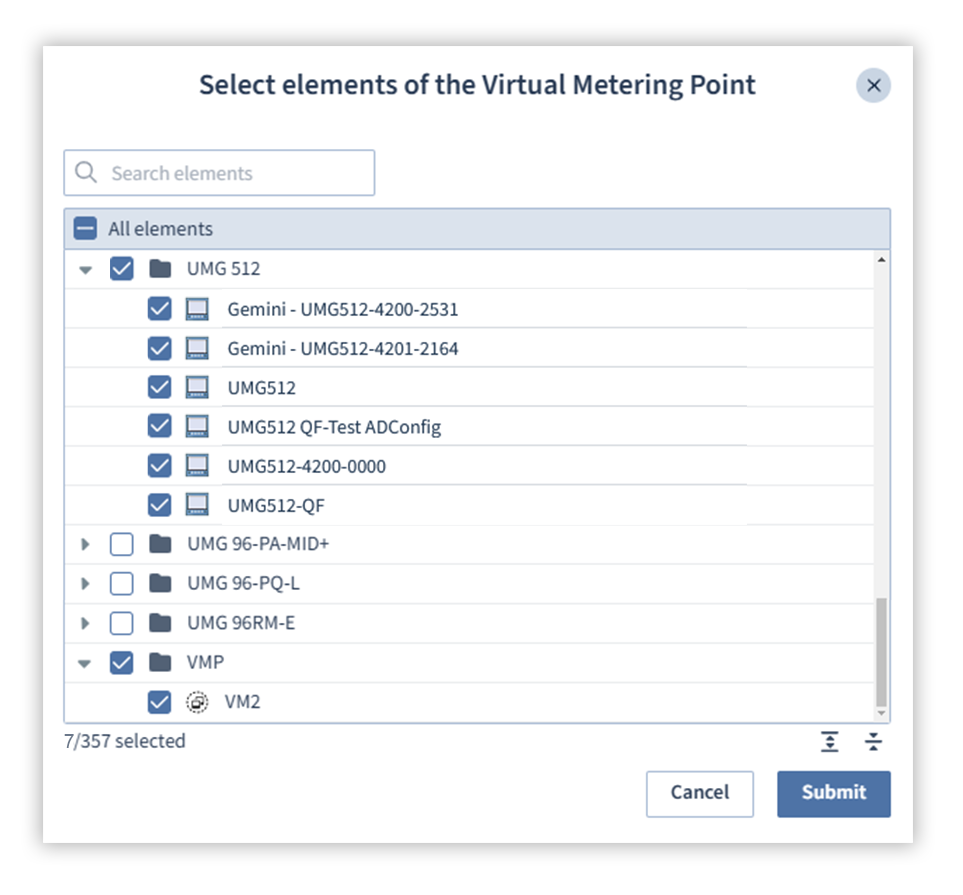
Adding elements to a virtual metering point
Click on the Select elements button to open the selection window.
In the selection window, use the checkboxes to select the elements that you want to add to the virtual metering point.
Click on the Confirm button to save the selection.
Note
A maximum of 100 elements can be added to a virtual metering point.
Different recording densities
If devices record measured values using different recording densities, the lowest common multiple is used:
|
Device 1: 10 min |
Virtual metering point: 30 min |
|
Device 2: 15 min |
Dealing with recording gaps
Over time, it can happen that recordings of measured values from different devices may shift and no longer match each other exactly. In these cases, care is taken during offsetting to ensure that the resulting recording gaps are aggregated into suitable intervals and offset accordingly.