Manage devices
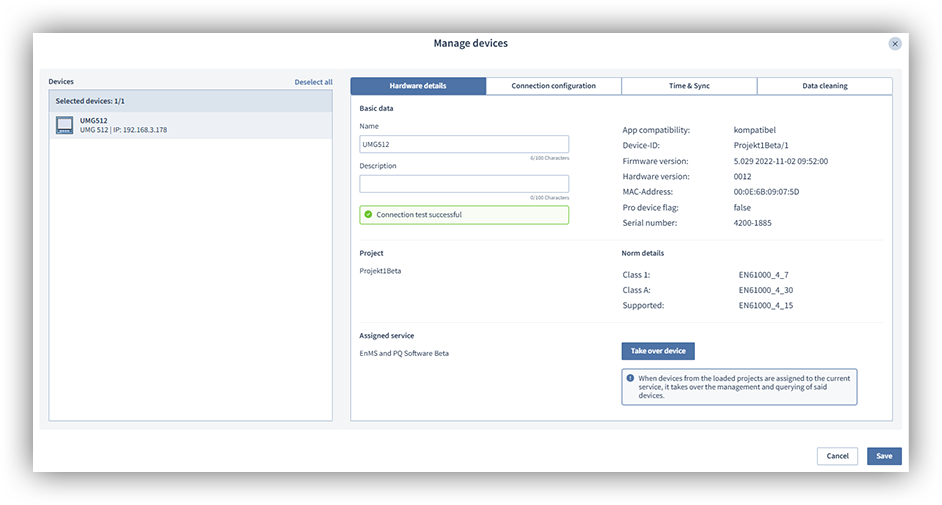
Hardware details
The Hardware details tab shows all the important information about your device, such as the serial number and MAC address, without having to look at the physical device. You can also change the device name and description on this tab. Click the Save button after you have changed the name or description of the device to apply the changes.
Clicking the Apply device button allows you to assign your devices to GridVis Web. This allows you to have your devices managed by GridVis Web. The service then takes over automatic actions such as reading out the devices. Once the devices have been assigned to GridVis Web, device actions can be carried out without starting GridVis Desktop.
Note
It is advisable to have the devices managed by the service, as the service usually runs continuously.
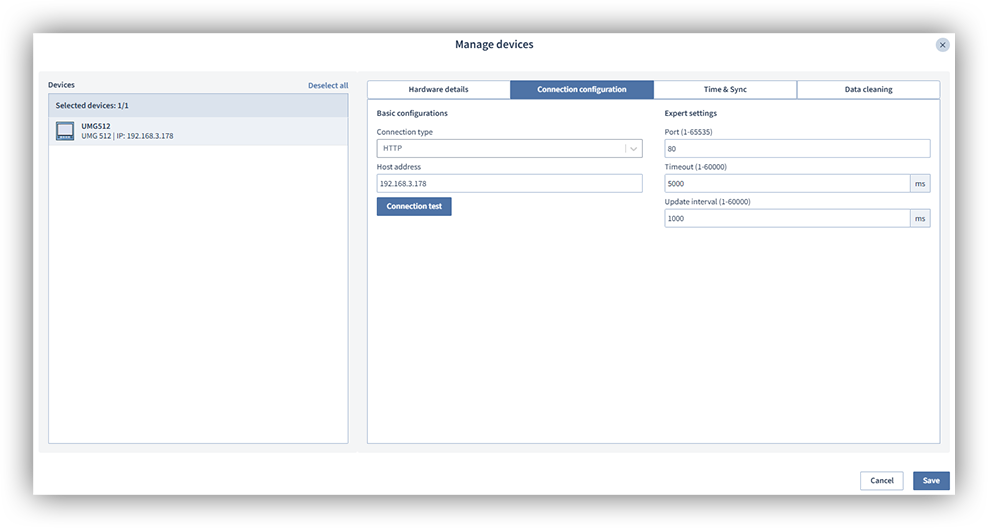
Connection
Use the Connection tab to change the connection settings of your devices without having to remove and re-add them. You can also carry out a Connection test to your device here at any time. To do so, click the Connection test button.
Once you have selected a device, you will see the basic settings and the advanced settings. Enter the new connection data for your device and click the Connection test button to test the connection to your device. Finally, click the Save button to add the device with the updated connection information and manage it in GridVis Web.
Note
Please note that you can only change the connection settings if you have selected a device. If you select more than one device, you can only perform a connection test for the devices.
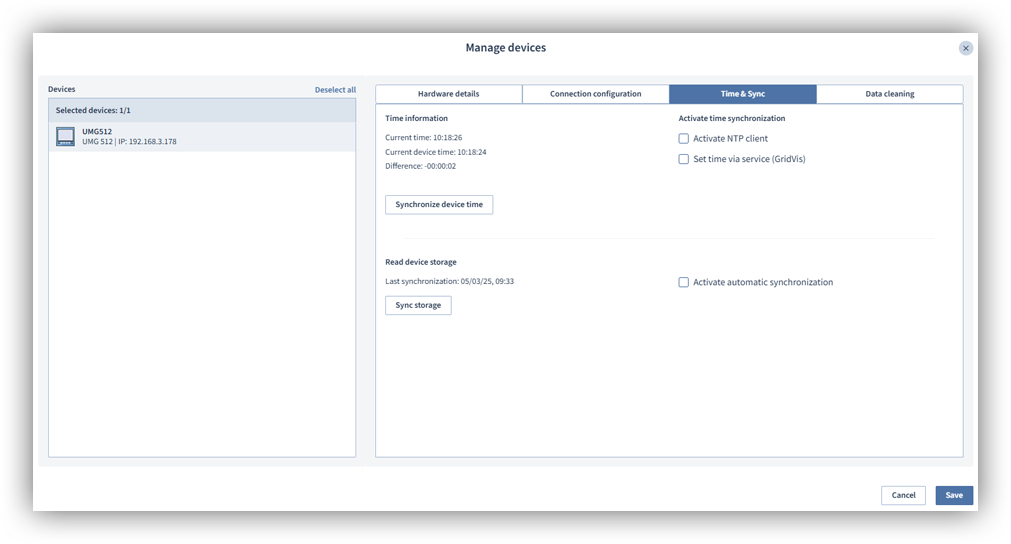
Time & Readout
Use the Time & Readout tab to set the time synchronization of your devices and read out the data memory.
Time information and time synchronization
The Time information area shows the current system time, the current device time and any possible difference between the two times. Clicking the Synchronize device time button synchronizes the system time and the device time. The device time is adjusted to match the system time.
You can also configure time synchronization for your devices. Time synchronization can be carried out either via an NTP client or via the GridVis service.
NTP client : You can provide an NTP server as a time source for all your devices. To do so, check the box next to Activate NTP client and enter the address of the NTP server. You can specify several NTP servers, but you must separate the addresses with a semicolon. If a server cannot be reached, the next specified server address is queried.
GridVis service : The device time can also be synchronized via the GridVis time. The GridVis time corresponds to the system time. Check the box next to Set time via the service (GridVis) and then select a Time point (time instant) at which the time is to be synchronized.
Reading out a device
In the area Read out the device's data memory , you can read out the device's data memory manually and configure an automatic readout of your device. Proceed as follows to manually read out the memory of the device:
In the area Read out data memory of the device , click the Read out data memory button.
Click the Save button to close the window.
GridVis Web can also read out your devices automatically. Proceed as follows to set up an automatic readout:
In the device management overview, select the device whose data memory you want to read out automatically.
Click the Manage device button.
Select the tab Time & Readout .
Activate the function Activate automatic readout in the Read out data memory of the device area.
Select a schedule for reading out the device.
Finally, click the Save button.
Note
You can use the Time Management area to adjust the times for reading out the devices at any time and add new ones.

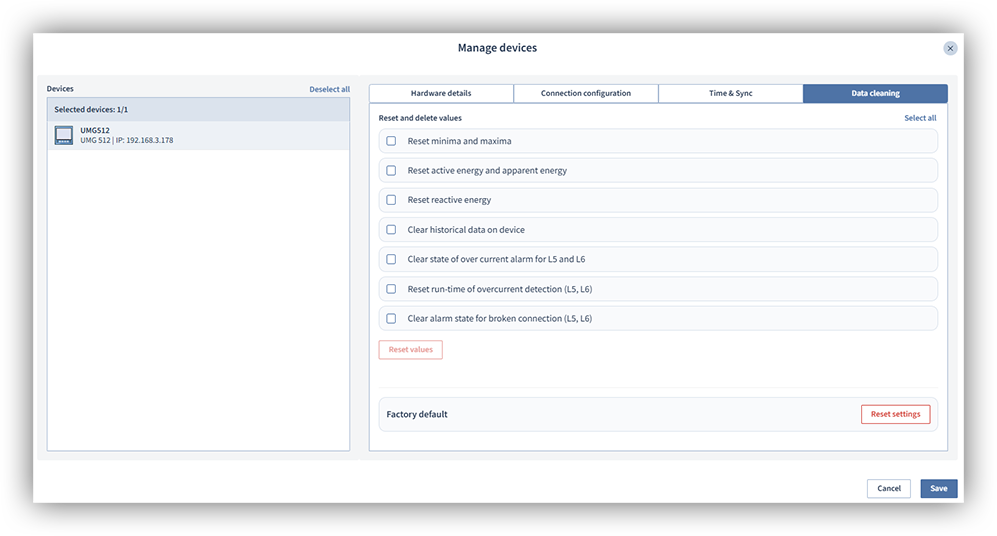
Data cleansing
Attention!
Resetting the devices to the factory settings cannot be undone and data may be lost!
Resetting individual values
In the Data cleansing area, you can reset the values and settings of your devices to the factory settings. You can then reassign your devices and use them as usual. Proceed as follows to reset your device:
Select the values you want to reset. Please note that the values displayed depend on the device selected.
Click the Reset values button.
A confirmation window opens. Here, click the Reset values button.
Finally, click the Save button.
Note
You can delete the values for several devices at the same time. Select the devices that have common values and then proceed as described above.
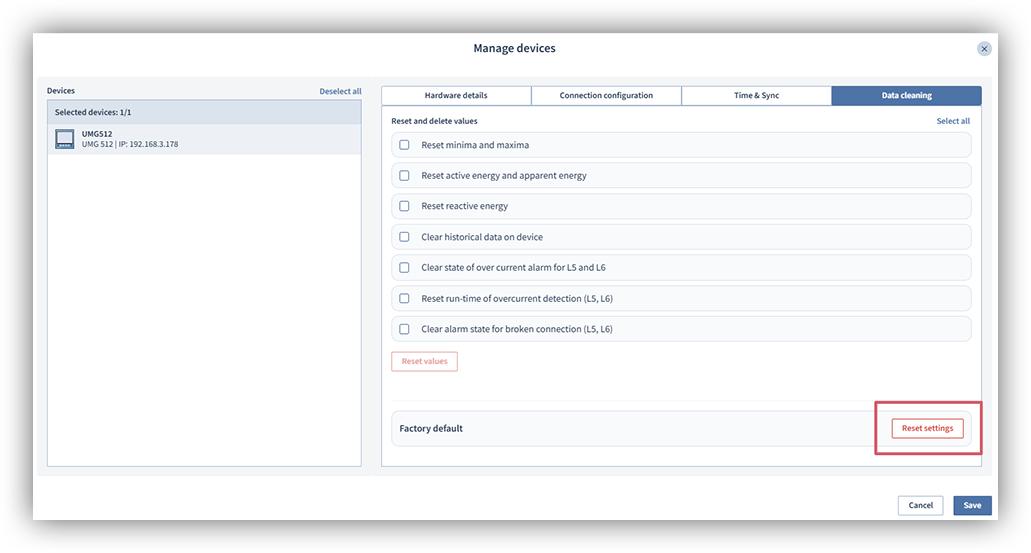
Reset to factory settings
You can also reset your devices to the factory settings. This will reset almost all of your device's settings. Only the connection settings of the device are retained. Proceed as follows to reset your device to the factory settings:
In the device management overview, select the device you want to reset.
Click the Manage device button.
Select the Data cleansing tab.
Click the Reset settings button.
A confirmation window opens. Here, click the Reset settings button.
Finally, click the Save button.