Send an Email
Note
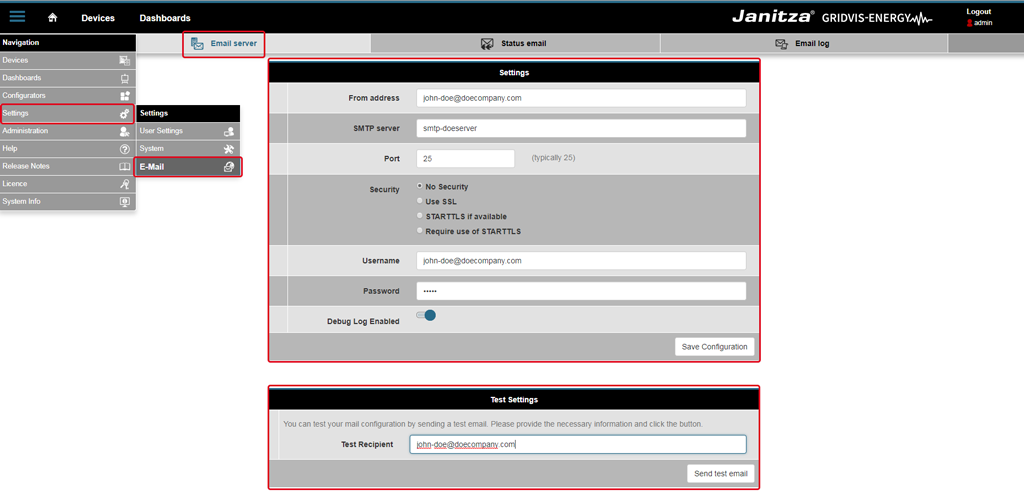
Before you use the option Send an Email for an alarm event, configure in the Service of your GridVis edition Expert your settings for the Email Server.
The window Email Server can be opened under Navigation Menu --> Settings --> Email (Tab Email Server).
You may have to ask your network administrator for the access data to the Email Servers!
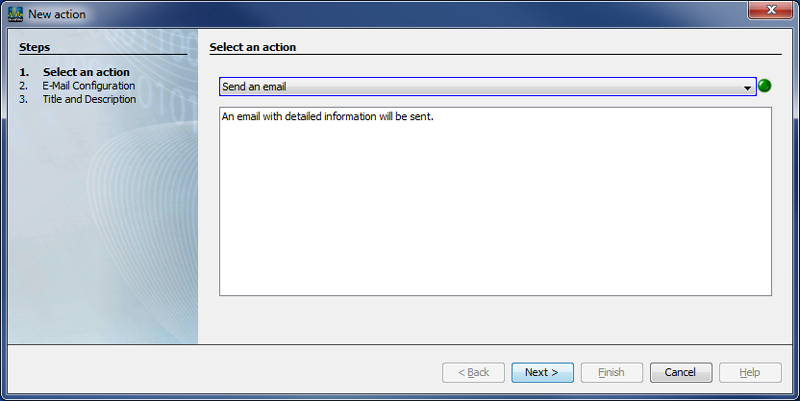
By selecting the option Send an Email,vit is possible to be informed of each alarm event (4 tabs in the window Create New Alarm Plan Configuration) via email. Proceed as follows:
After selecting the option Send an Email in the first step of the window New Action, click on the button Continue.
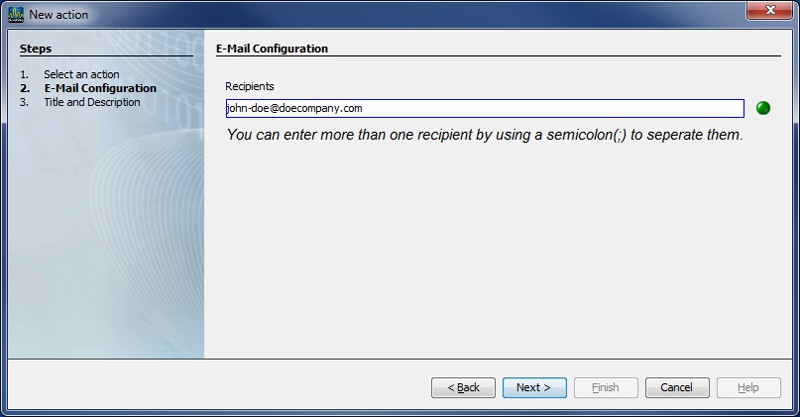
In the window New Action, the second step, Email Configuration will appear.
Enter into the entry field Recipient a valid email address.
Click on the button Continue.
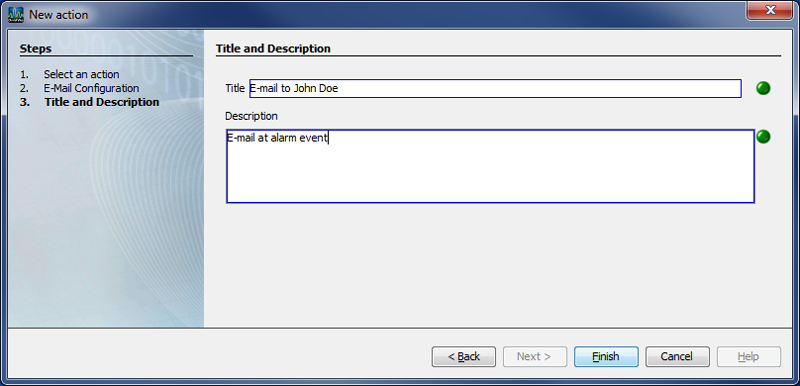
In the window New Action, the third step, Title and Description will appear.
Enter into the entry field Title the title of the email and into the entry field Description a description of the email.
Click on the button Done.
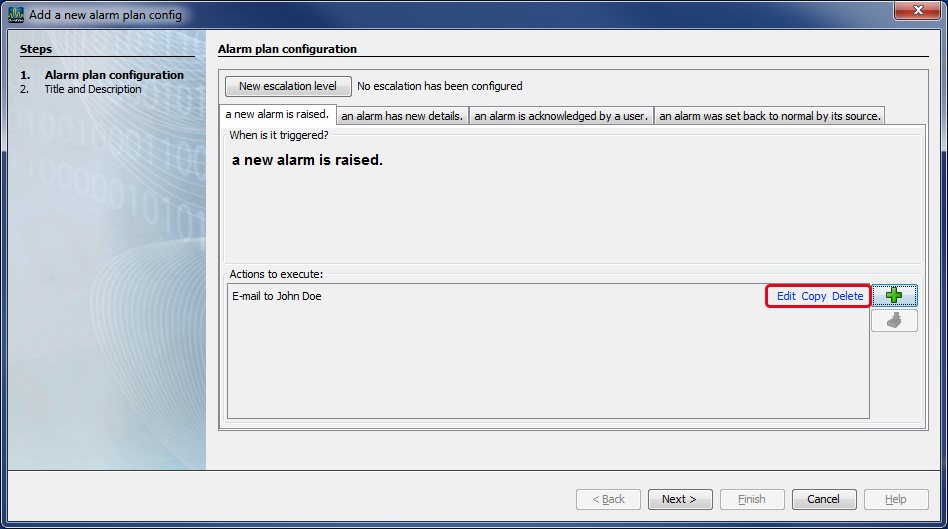
In the dialog box Create New Alarm Configuration under Actions to be Executed, the previously entered title of the email will appear with the 3 buttons:
|
1 |
Edit |
Click on the button to edit the action Send an Email anew. |
|
2 |
Copy |
|
|
3 |
Delete |
Click on the button Delete to delete the action. |
|
4 |
|
Click on the button to create a new action. |
|
5 |
|
Click on the button to insert actions from the cache. |


Note
The above-described Actions to be Executed can be configured for each alarm event (4 tabs).
Click on the button Continue.
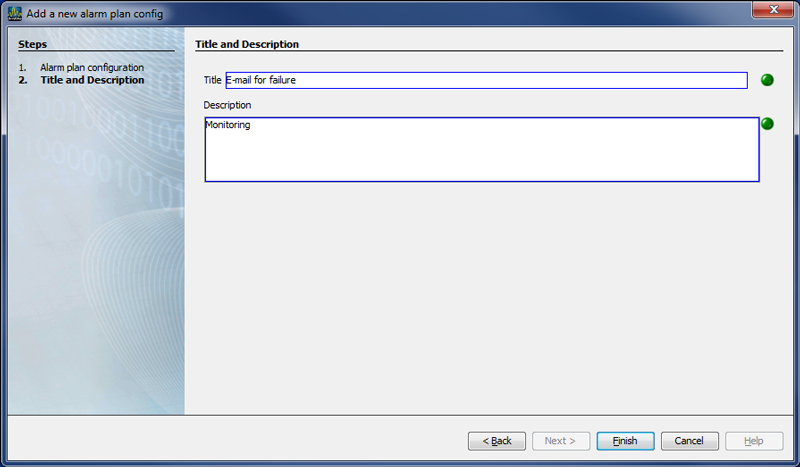
In the window New Alarm Plan Configuration the second step, Title and Description (for the alarm plan in the alarm plan overview) will appear.
Enter into the entry field Title the title of your alarm plan (appears as Name in the alarm plan overview).
Enter into the entry field Description the description of your alarm plan (appears as Description in the alarm plan overview).
To finish, click on the button Done.
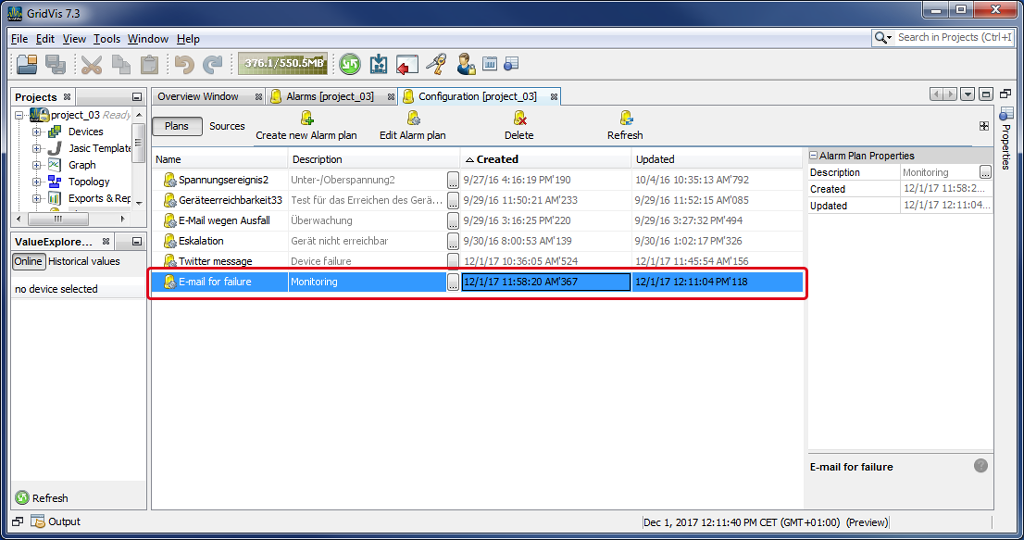
In the window (Alarm) Configuration (alarm plan overview), your saved alarm plan will appear in the list, ready to connect to an alarm source (cf. Alarm Sources ).
SSL/TLS Encryption of emails in the BLACKFIN series (UMG 508, UMG 509, UMG 511, UMG 512, UMG 604, UMG 605) and UMG96RM-E: